(Mega)Table Tutorial
Overview
This tutorial will show you how to use our Figma table builders and how-to easily populate them with data from a google sheet.
What you need
Figma
Figma plugins: Google Sheets Sync, Select Layers
A google sheet with the information you would like to put into your table. Example sheet
A smile on your face cause you are so stoked about tables!
Extras: Megatable documentation, more menu documentation, kite’s data table (which is great to see as a starting point, but for Enterprise we needed a lot more functionality, which is why we’ve created something a bit more complex)
Main Tutorial
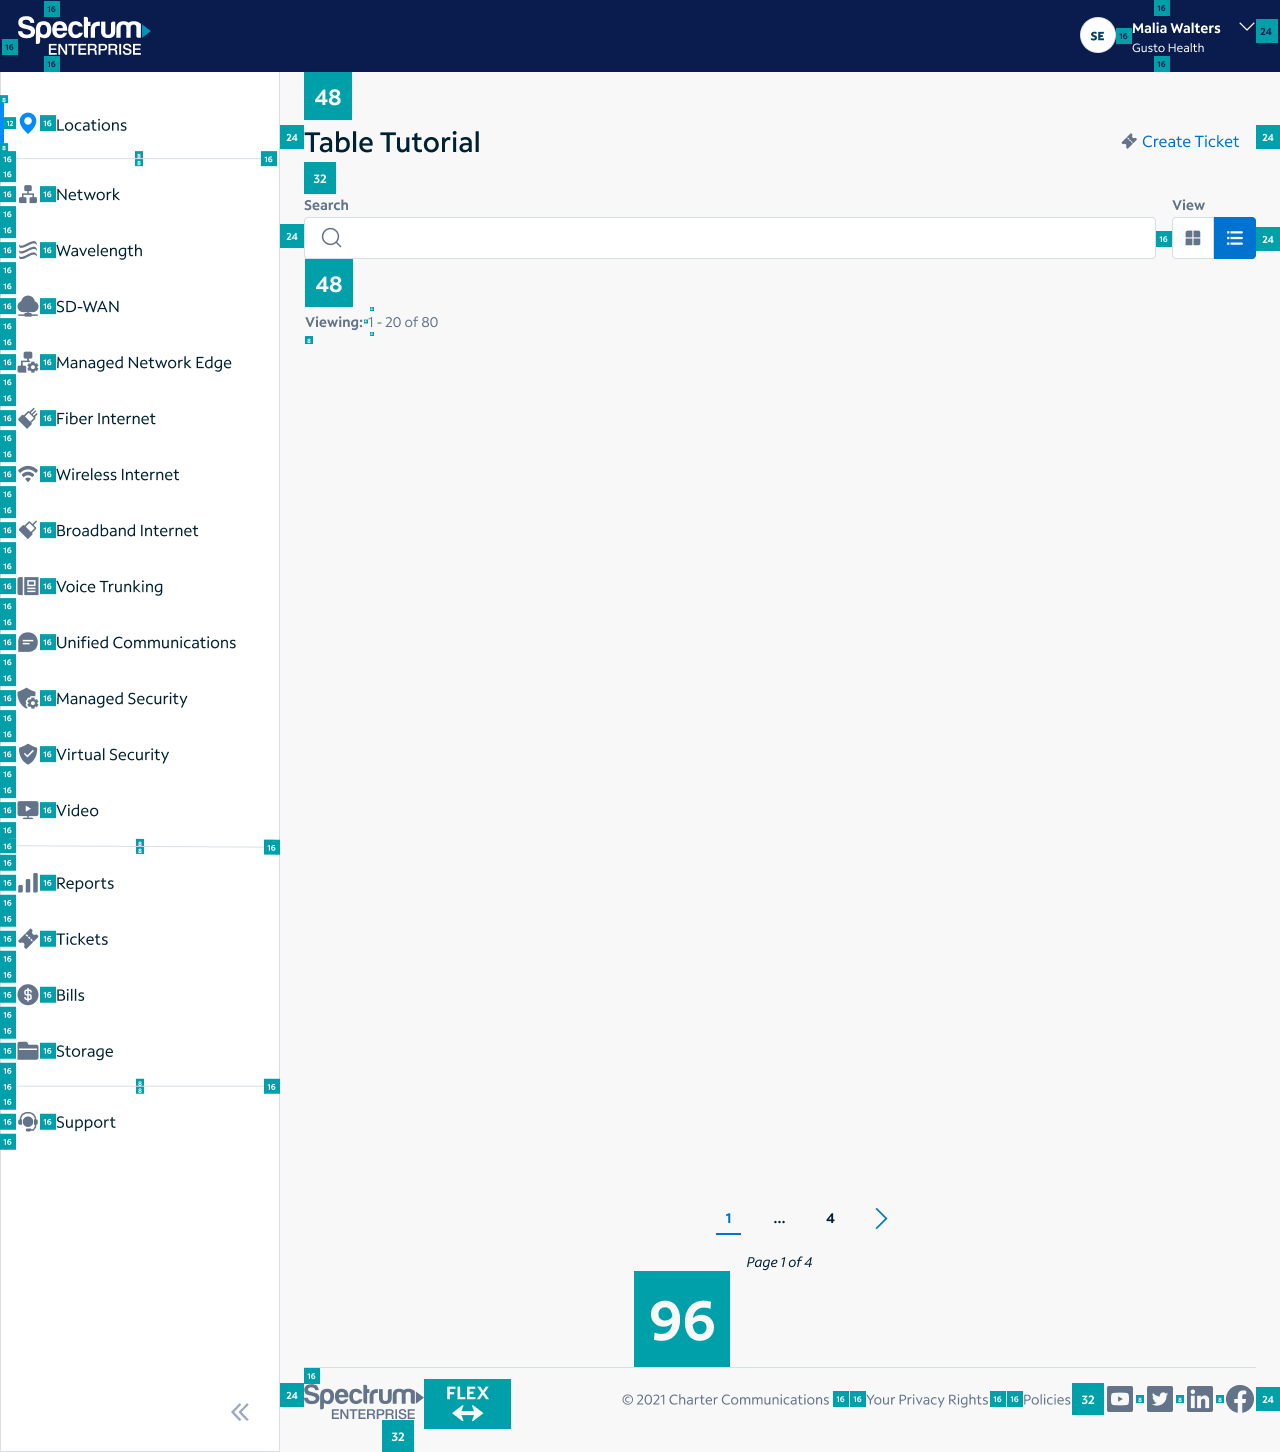
Begin with a comp set up with everything except your table. Everything should already be emojied and layers should be in order.
For sake of clarity I will be working with the spacers on in this example, but will not turn the spacers on in the table until the very end.
You can and should work how you feel most comfortable though!
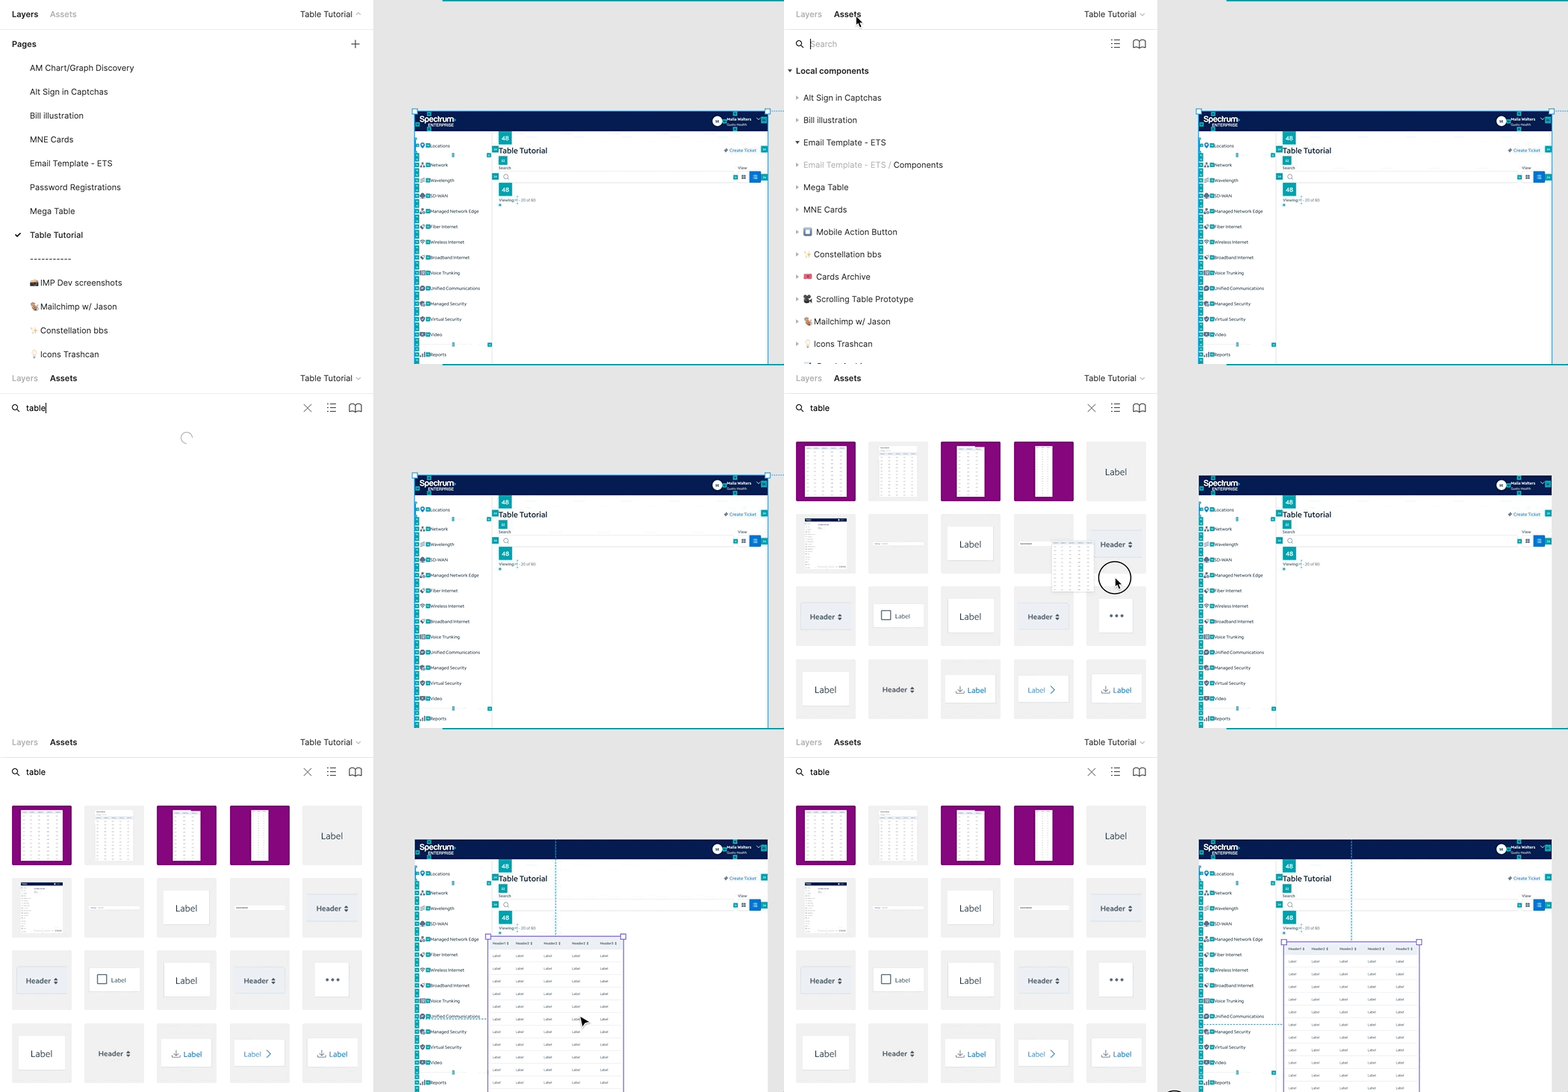
Once you have that navigate to the asset panel and search for table. This will bring up our table builders.
Please note that builders for mobile and desktop are different.
Drag that builder onto your comp.
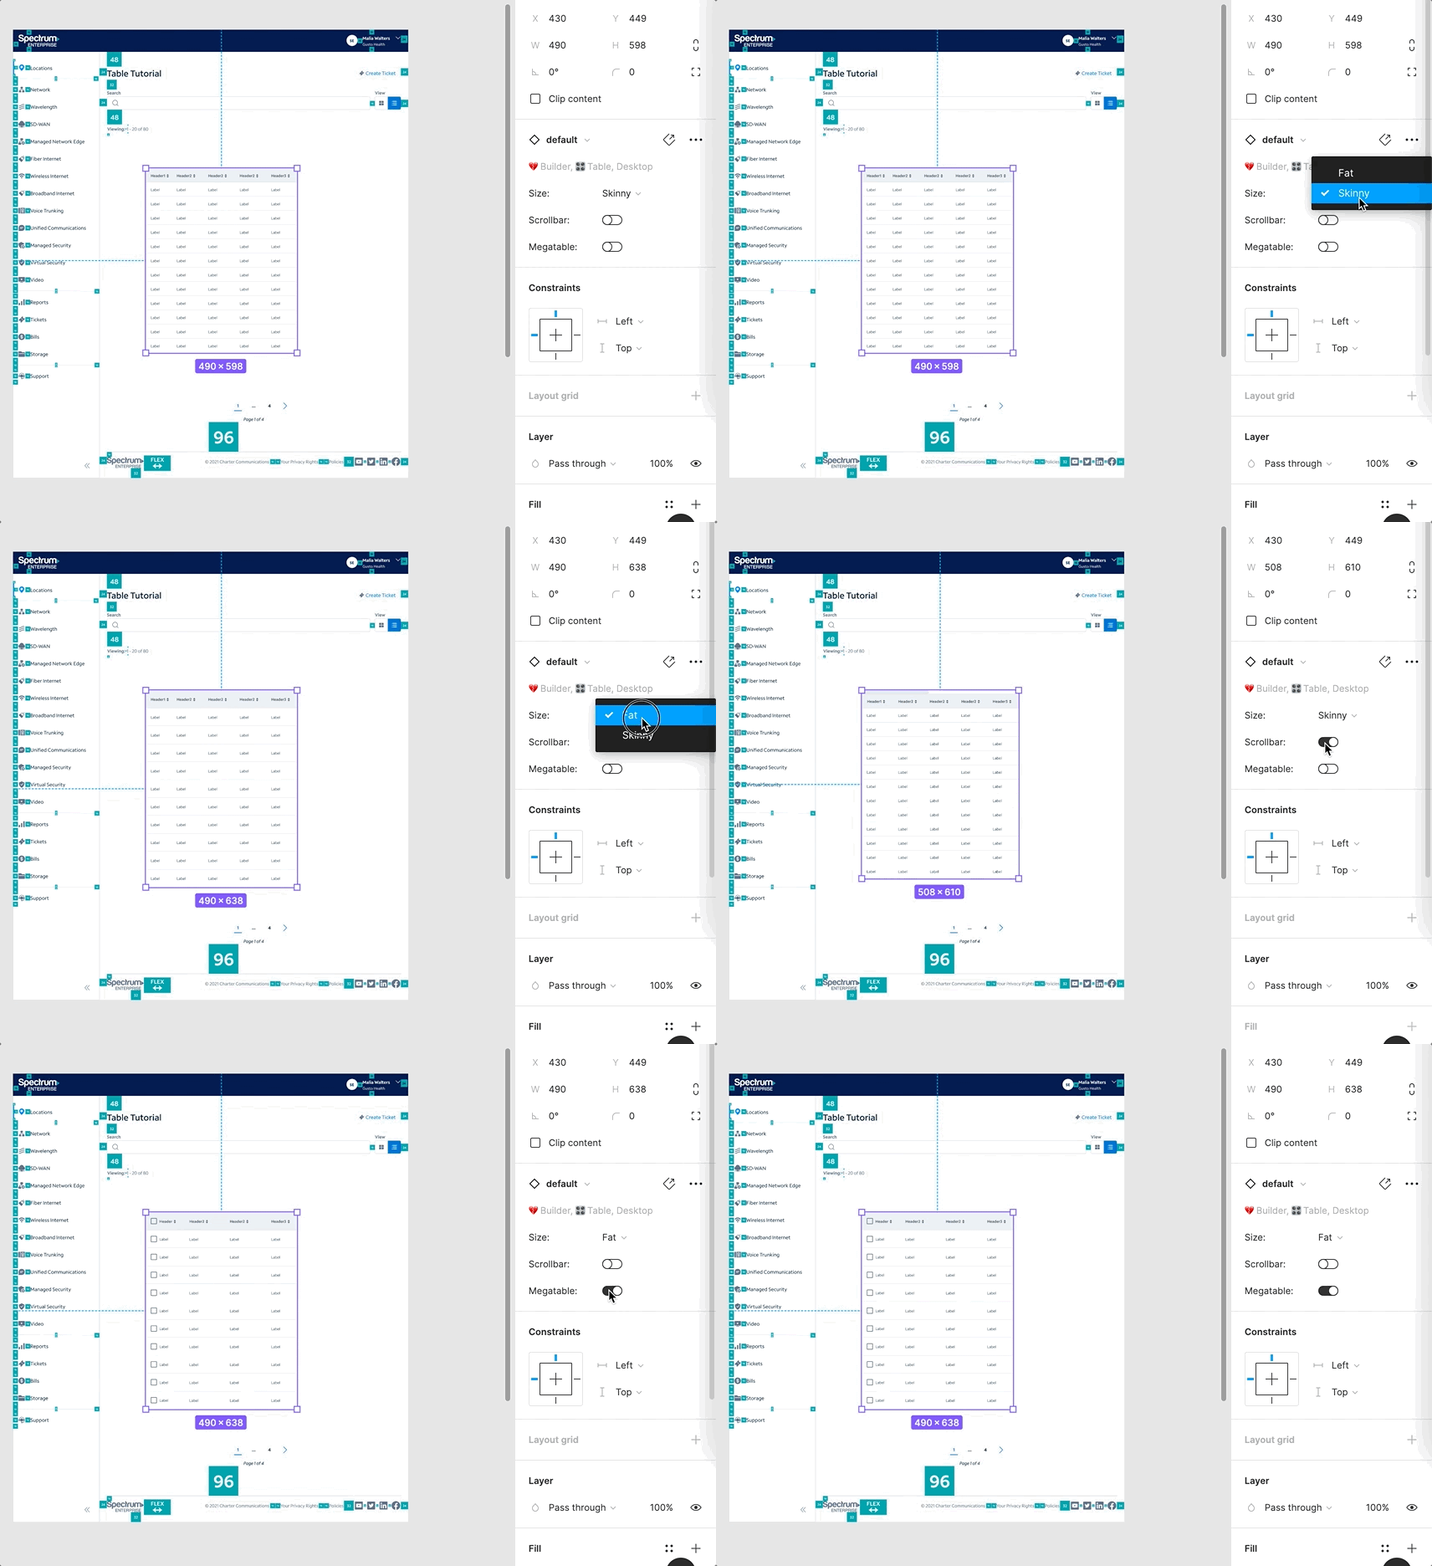
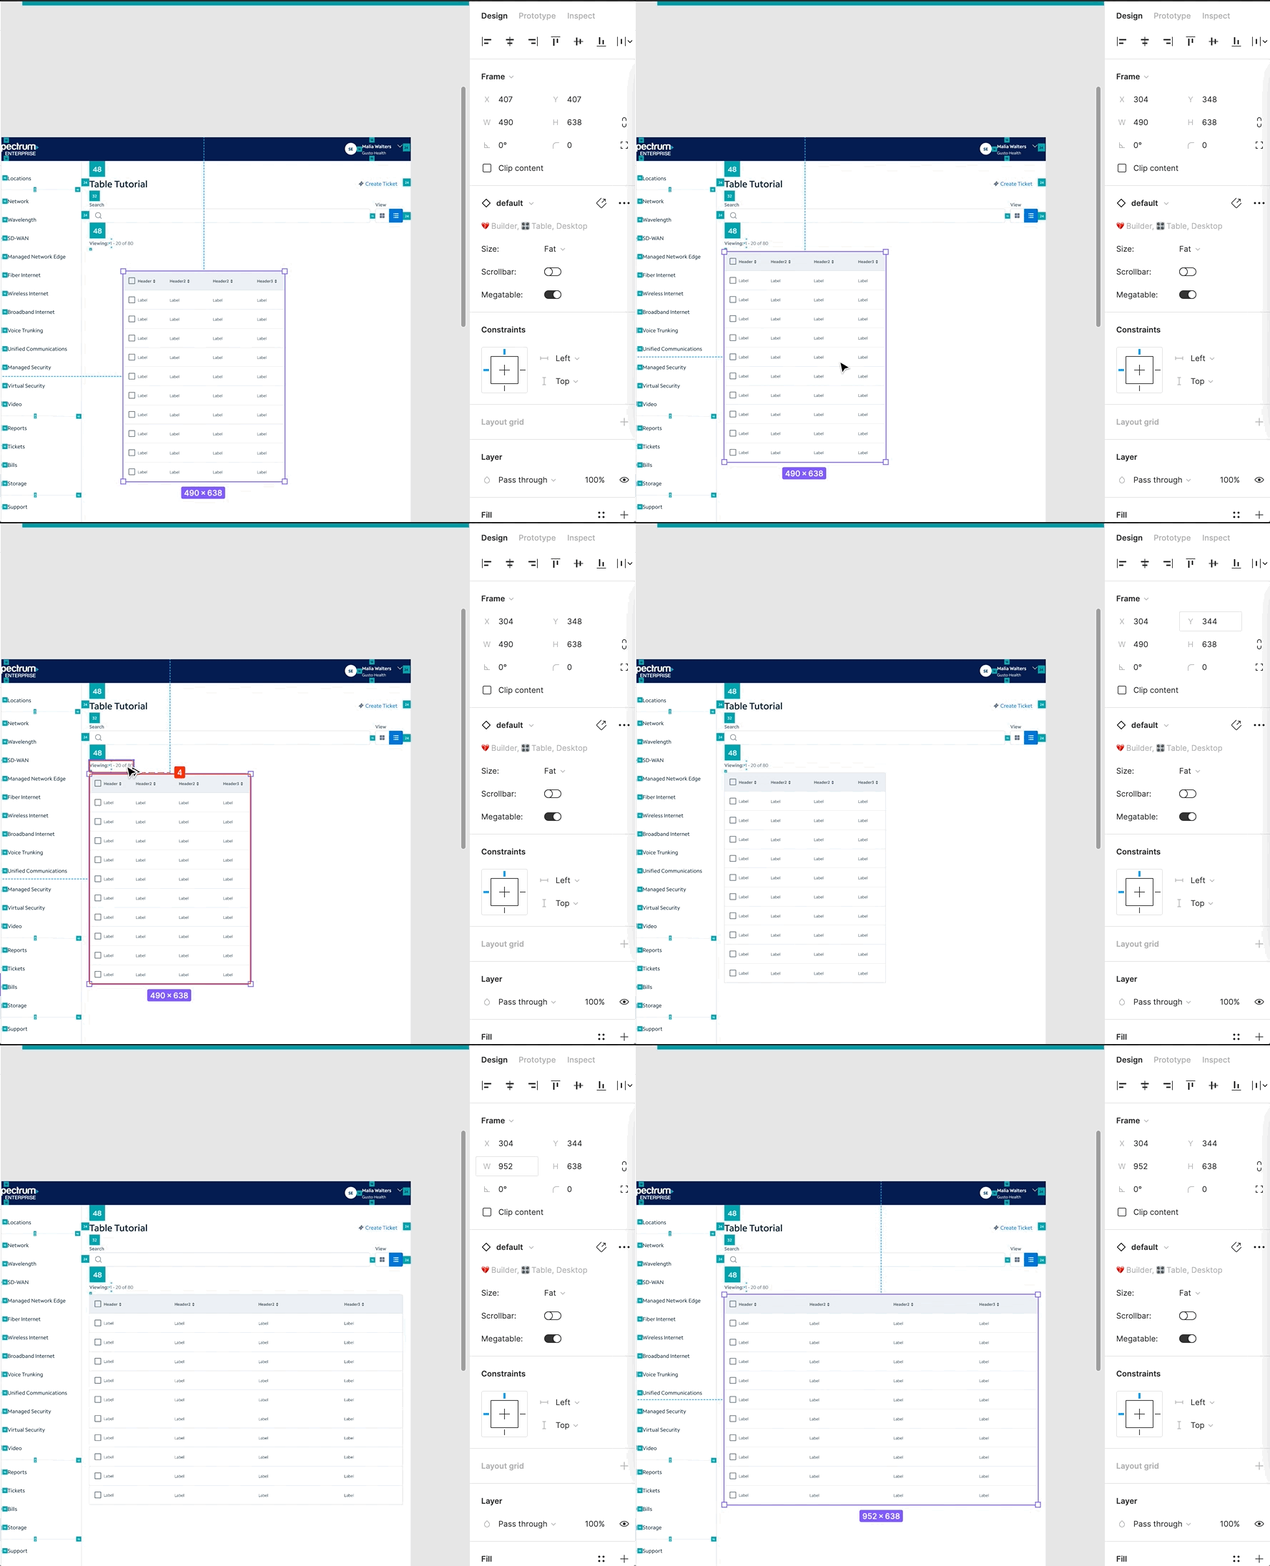
Once you have that builder in your comp, you can begin changing to the appropriate variant for your situation.
You can change the size, toggle the scrollbar, and toggle the megatable (checkbox). Please note that the megatable can only be in the fat size. Changing these variants at this step in the process will make you life a lot easier.
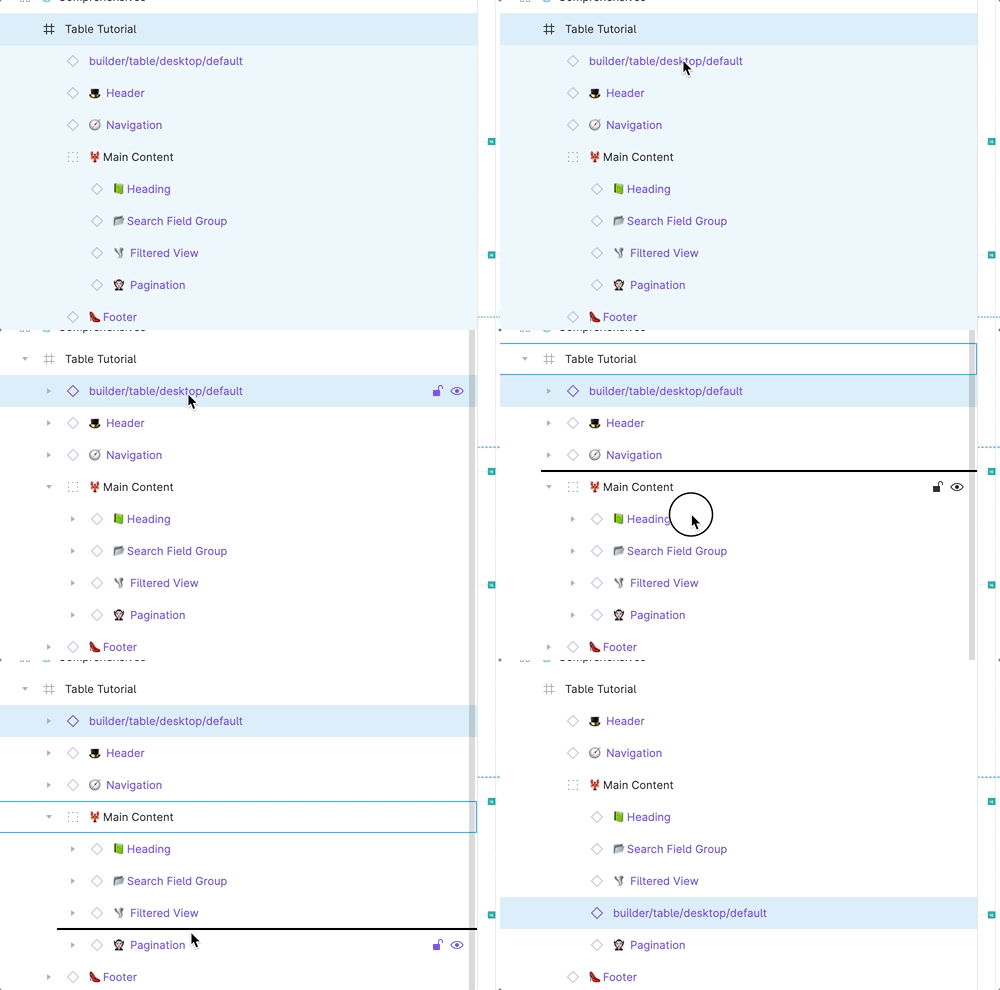
After that you can drag the builder to the appropriate layer order.
And now you can resize based on your comp.
Hint: If the table is spanning the full page on desktop it should be 952 px.
The columns will resize automatically, which is handy if you need all of the table columns to be the same size.
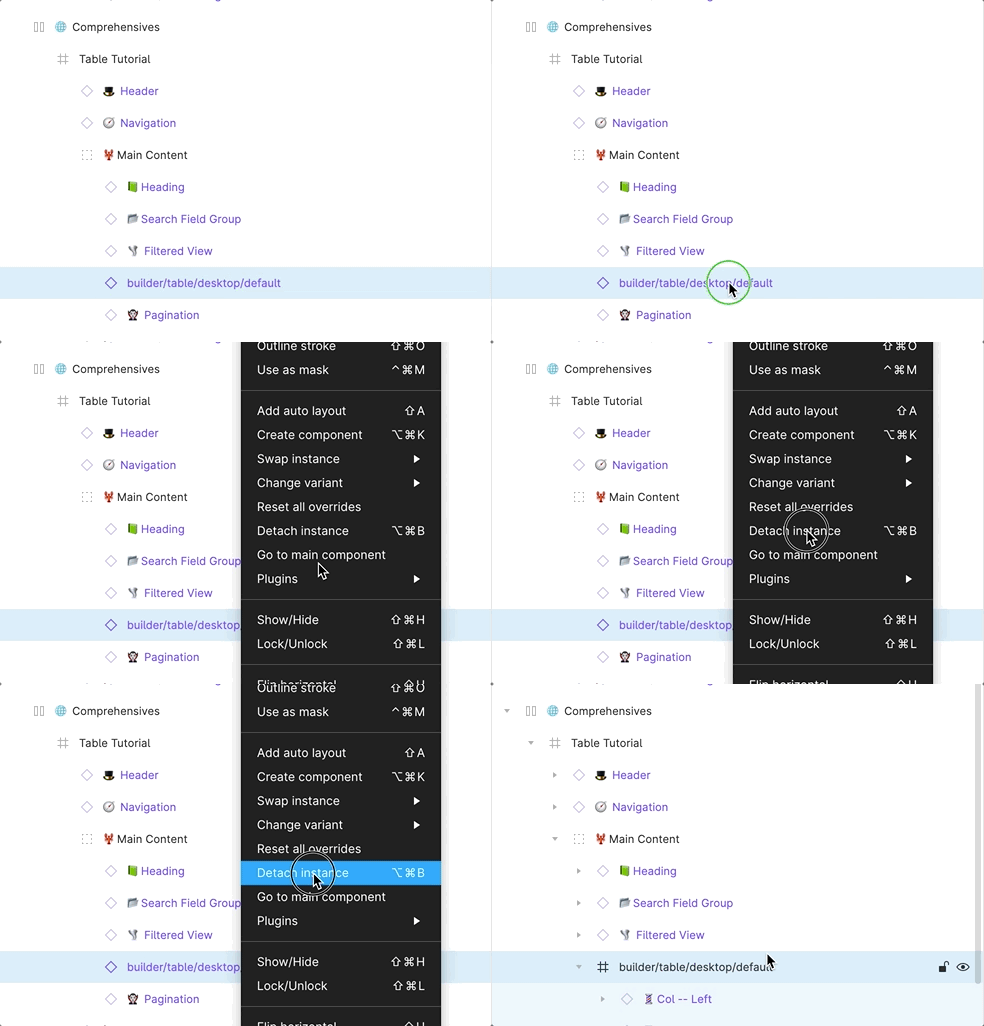
Detach the component by right clicking and selecting “detach instance”, or use the shortcut Option + Command + B (on Mac).
Now you can rename the layer to “🎛 Table”
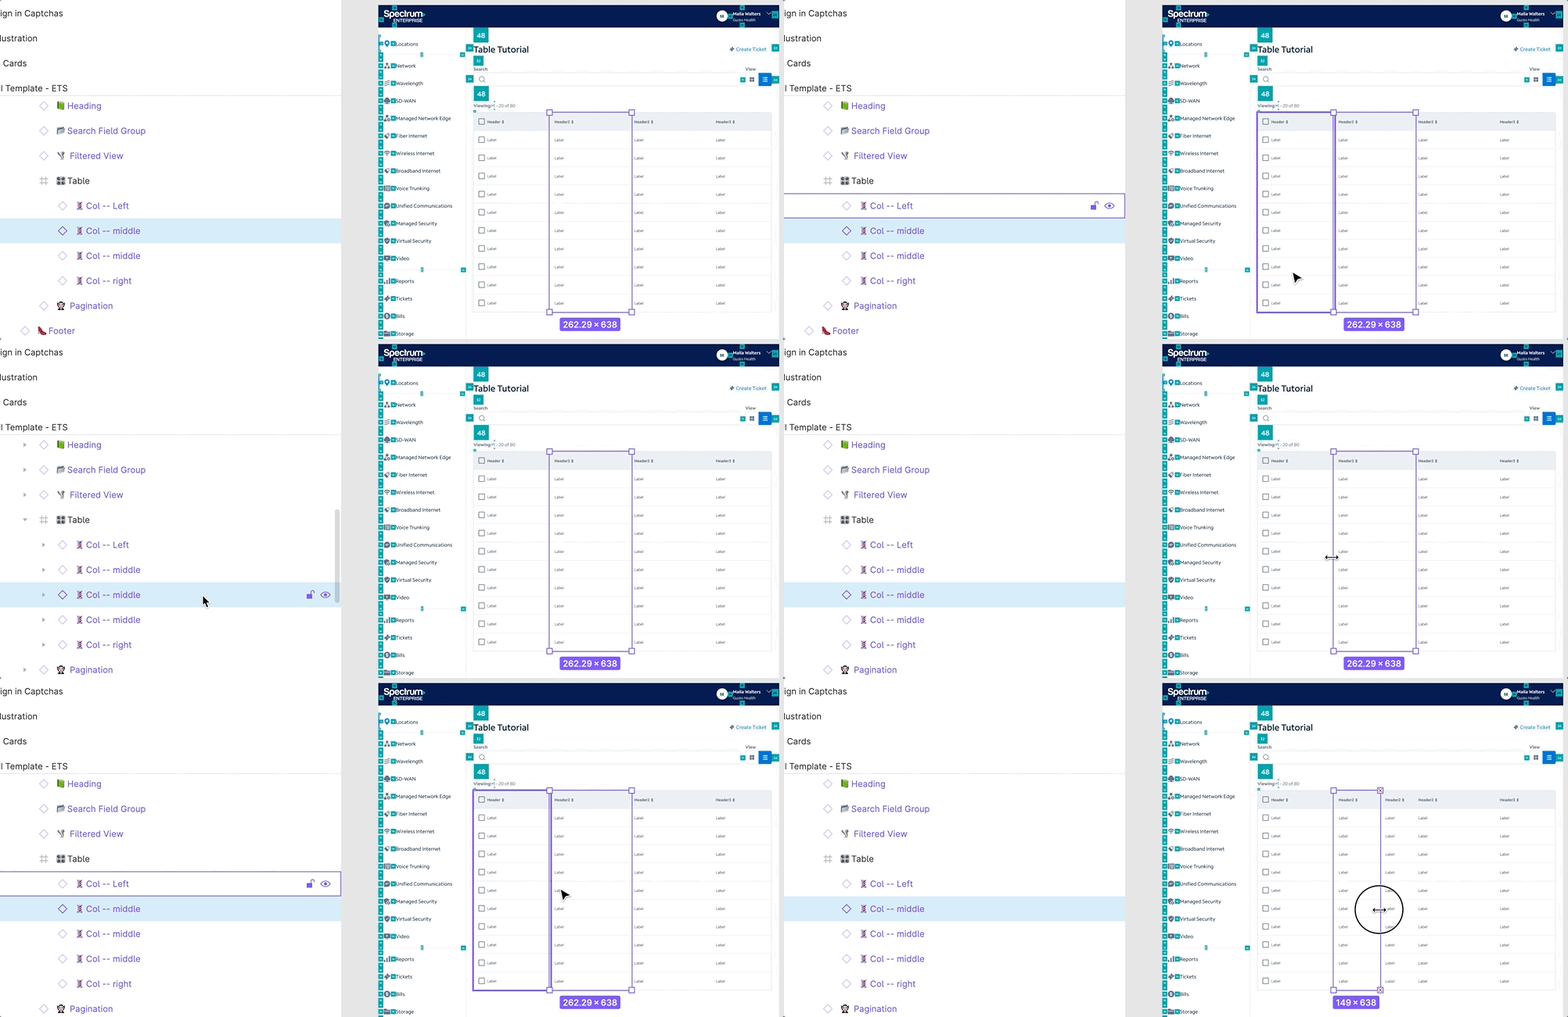
Within the table builder, which is now a frame, you should see 4 columns. Assess how many columns you would like to show in this comp.
Delete if you need but, you can also add more columns by copying and pasting. In the gif you can see we copy one of the middle columns, and then have to resize accordingly.
This will take some adjusting based on whatever content is populated into the tables, so don’t worry you can always come back and resize.
From there it’s handy to rename your columns with their appropriate content so you don’t get confused. As seen to the side, this would be how to go about renaming for our current content.
Now we can begin populating each column with content. First select the Left column component for users.
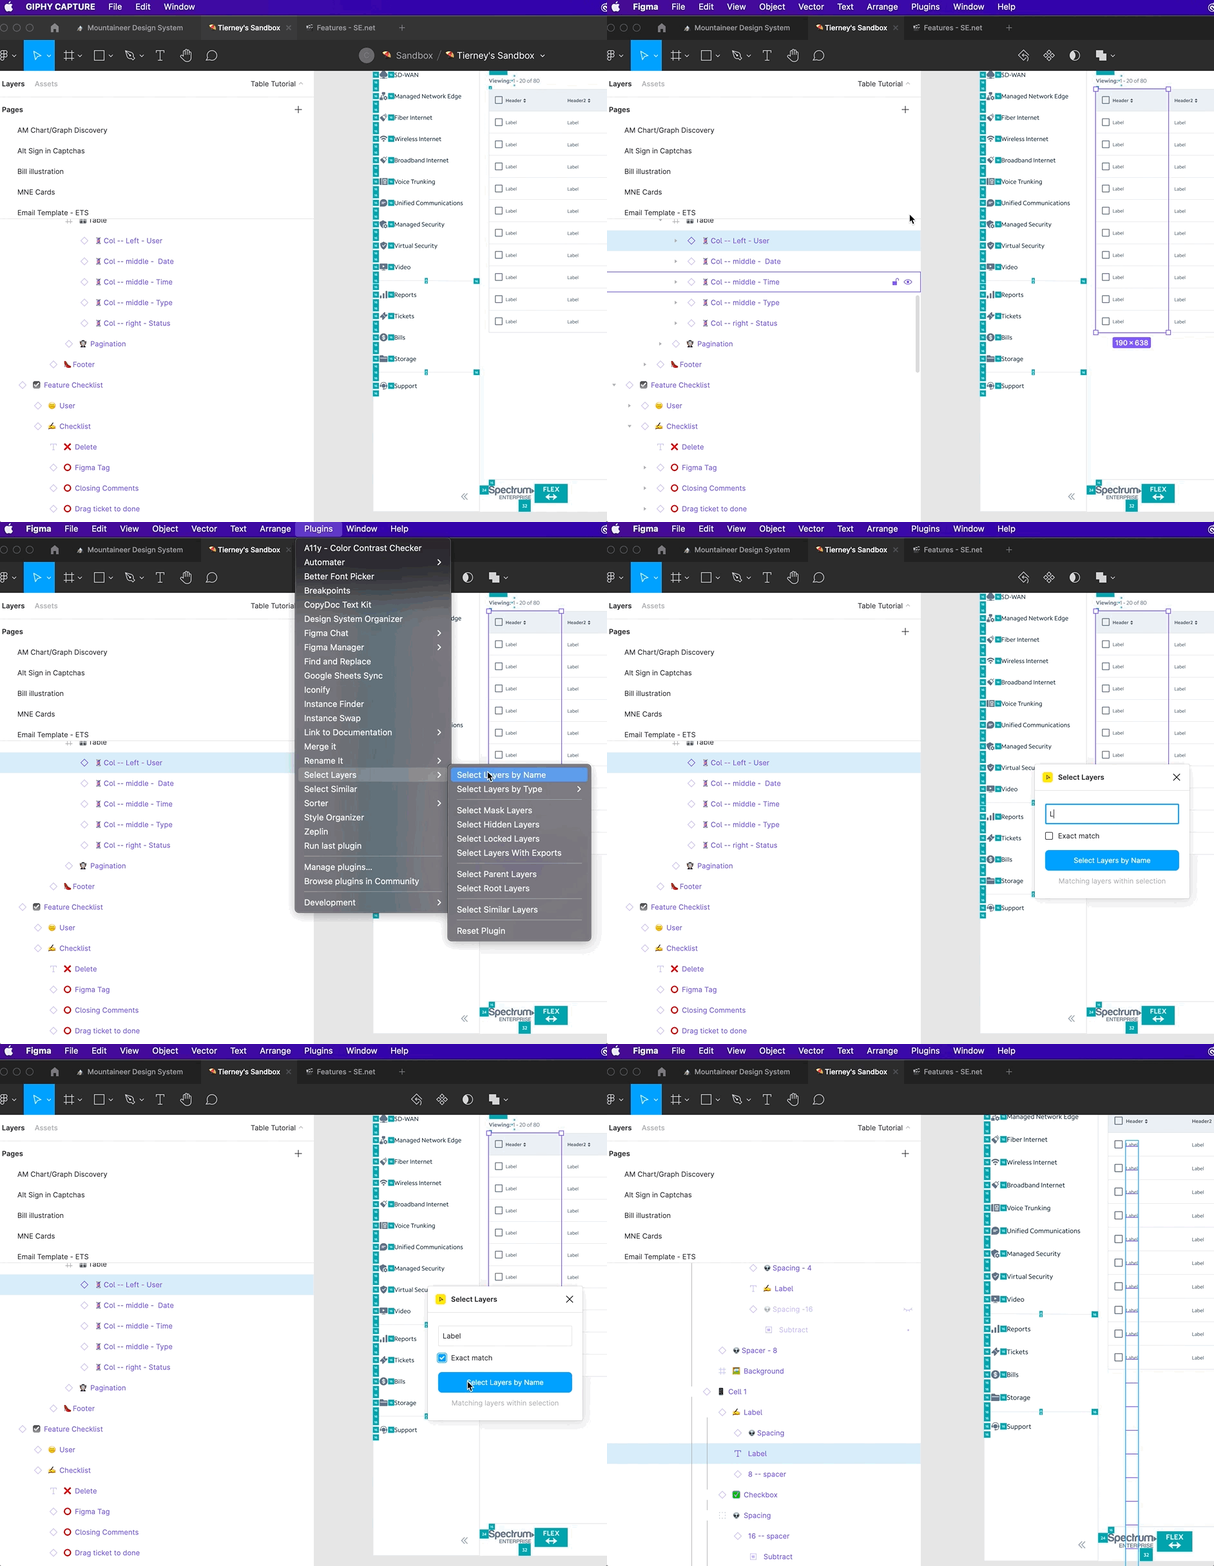
Then open the plugin “Select Layers”. We will be using the Select Layers by name function.
This will open a modal that you will type “Label” into, and make sure you have exact match checked (otherwise this will select all layers with the Label in their name)
Once you hit the select layers by name button this will select all layers named “Label” in the entire component.
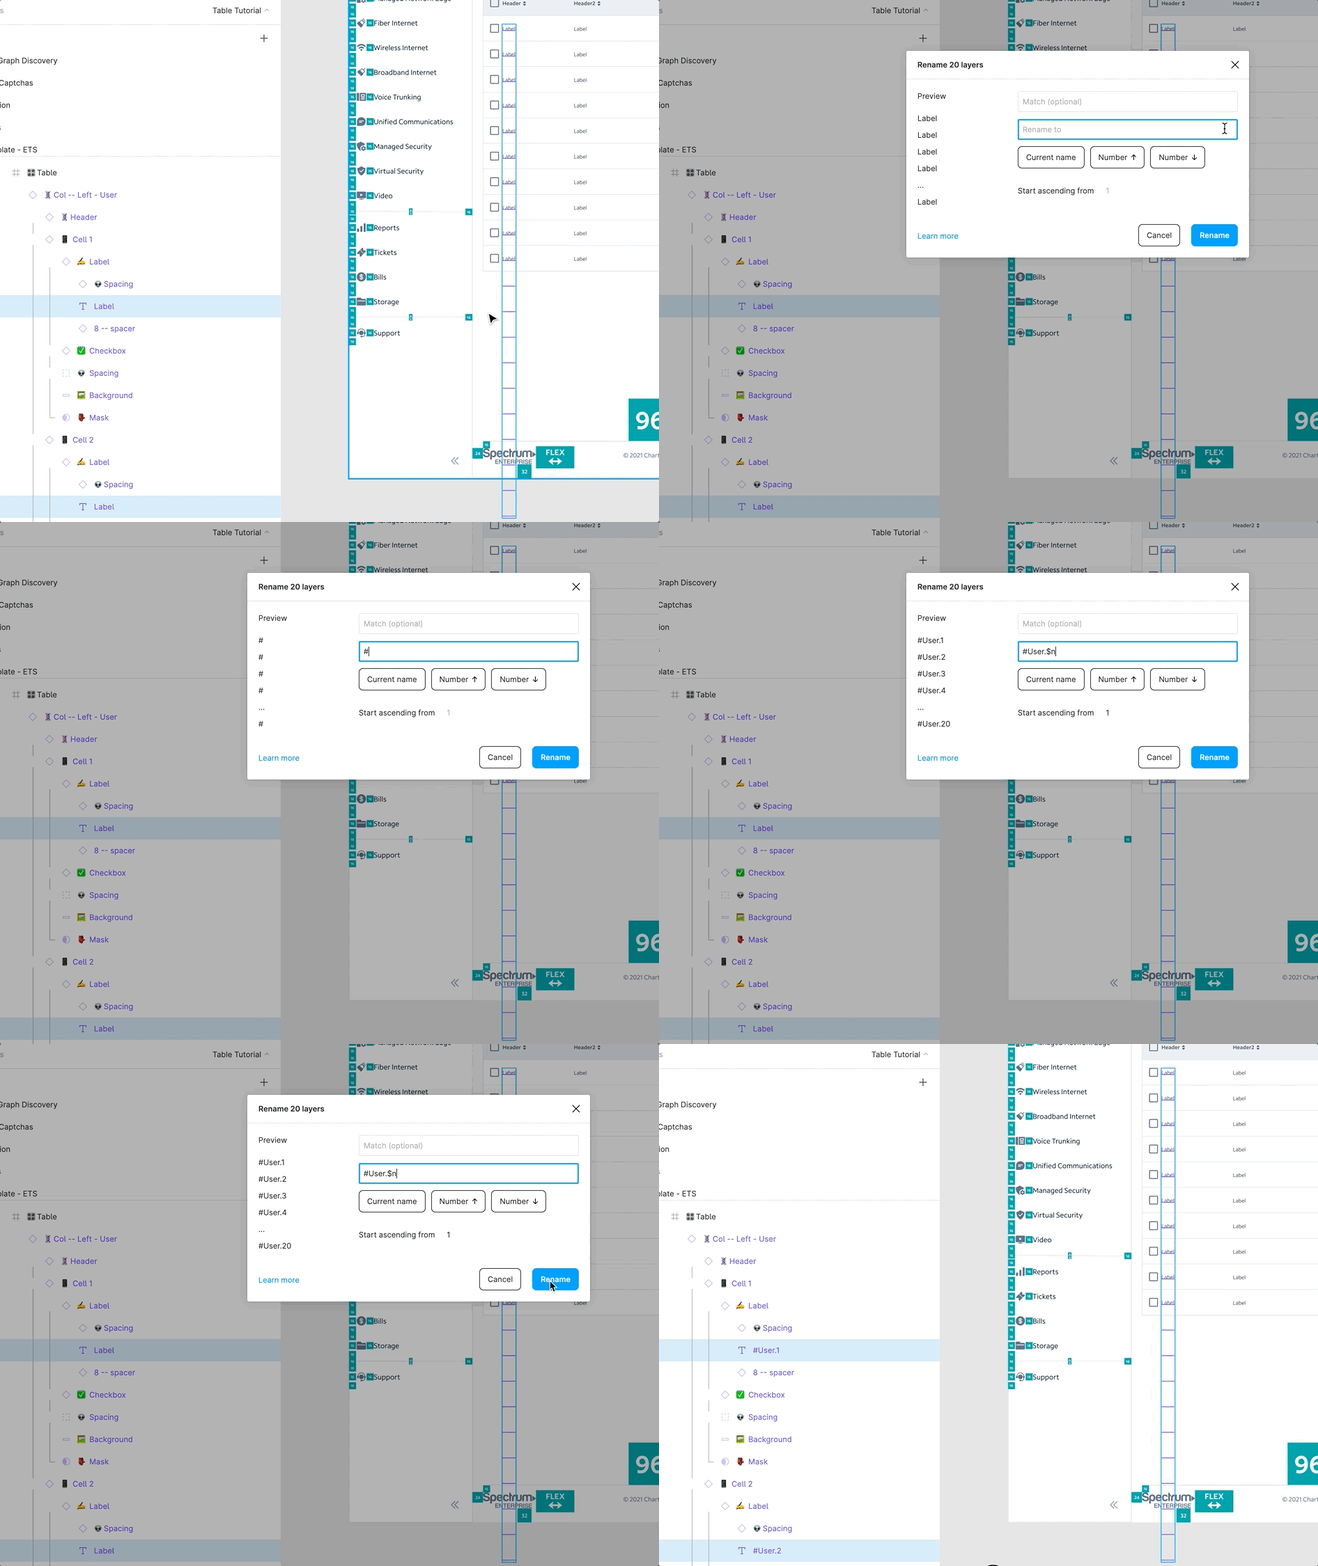
From there Command + R to rename accordingly, make sure you don’t click out of the layers you have selected.
This will open another modal that will allow you to rename all layers. Use this formula. # + Name of column in your google sheet + .$n.
Once you hit the rename button this will rename all layers and tag them in order.
Once you’ve changed the layer names all you have left to do is sync it to the google sheet.
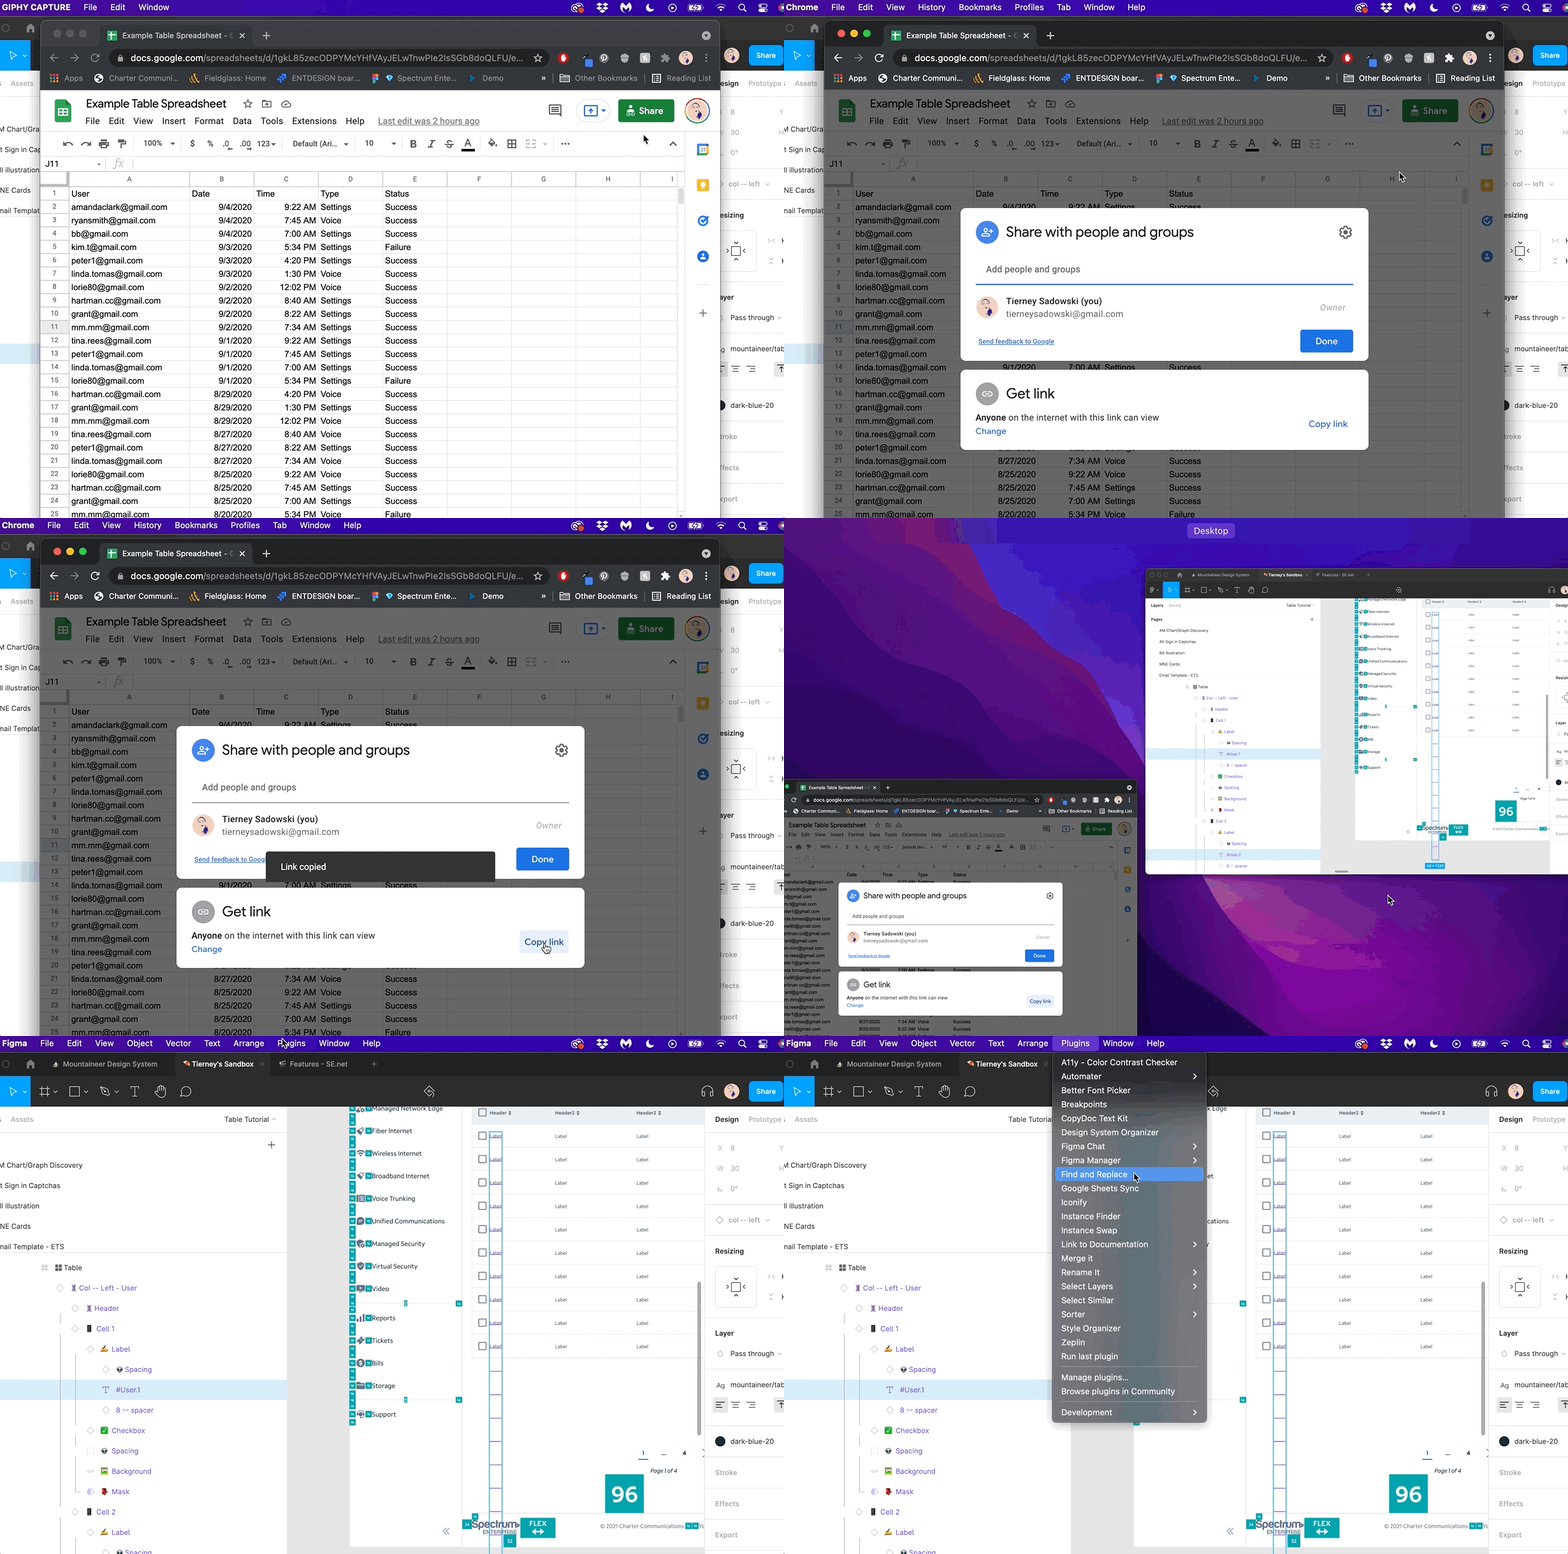
Go to your google sheet and grab a shareable link (make sure this isn’t a private link), and then head back to Figma and open the Google Sheet Sync Plugin
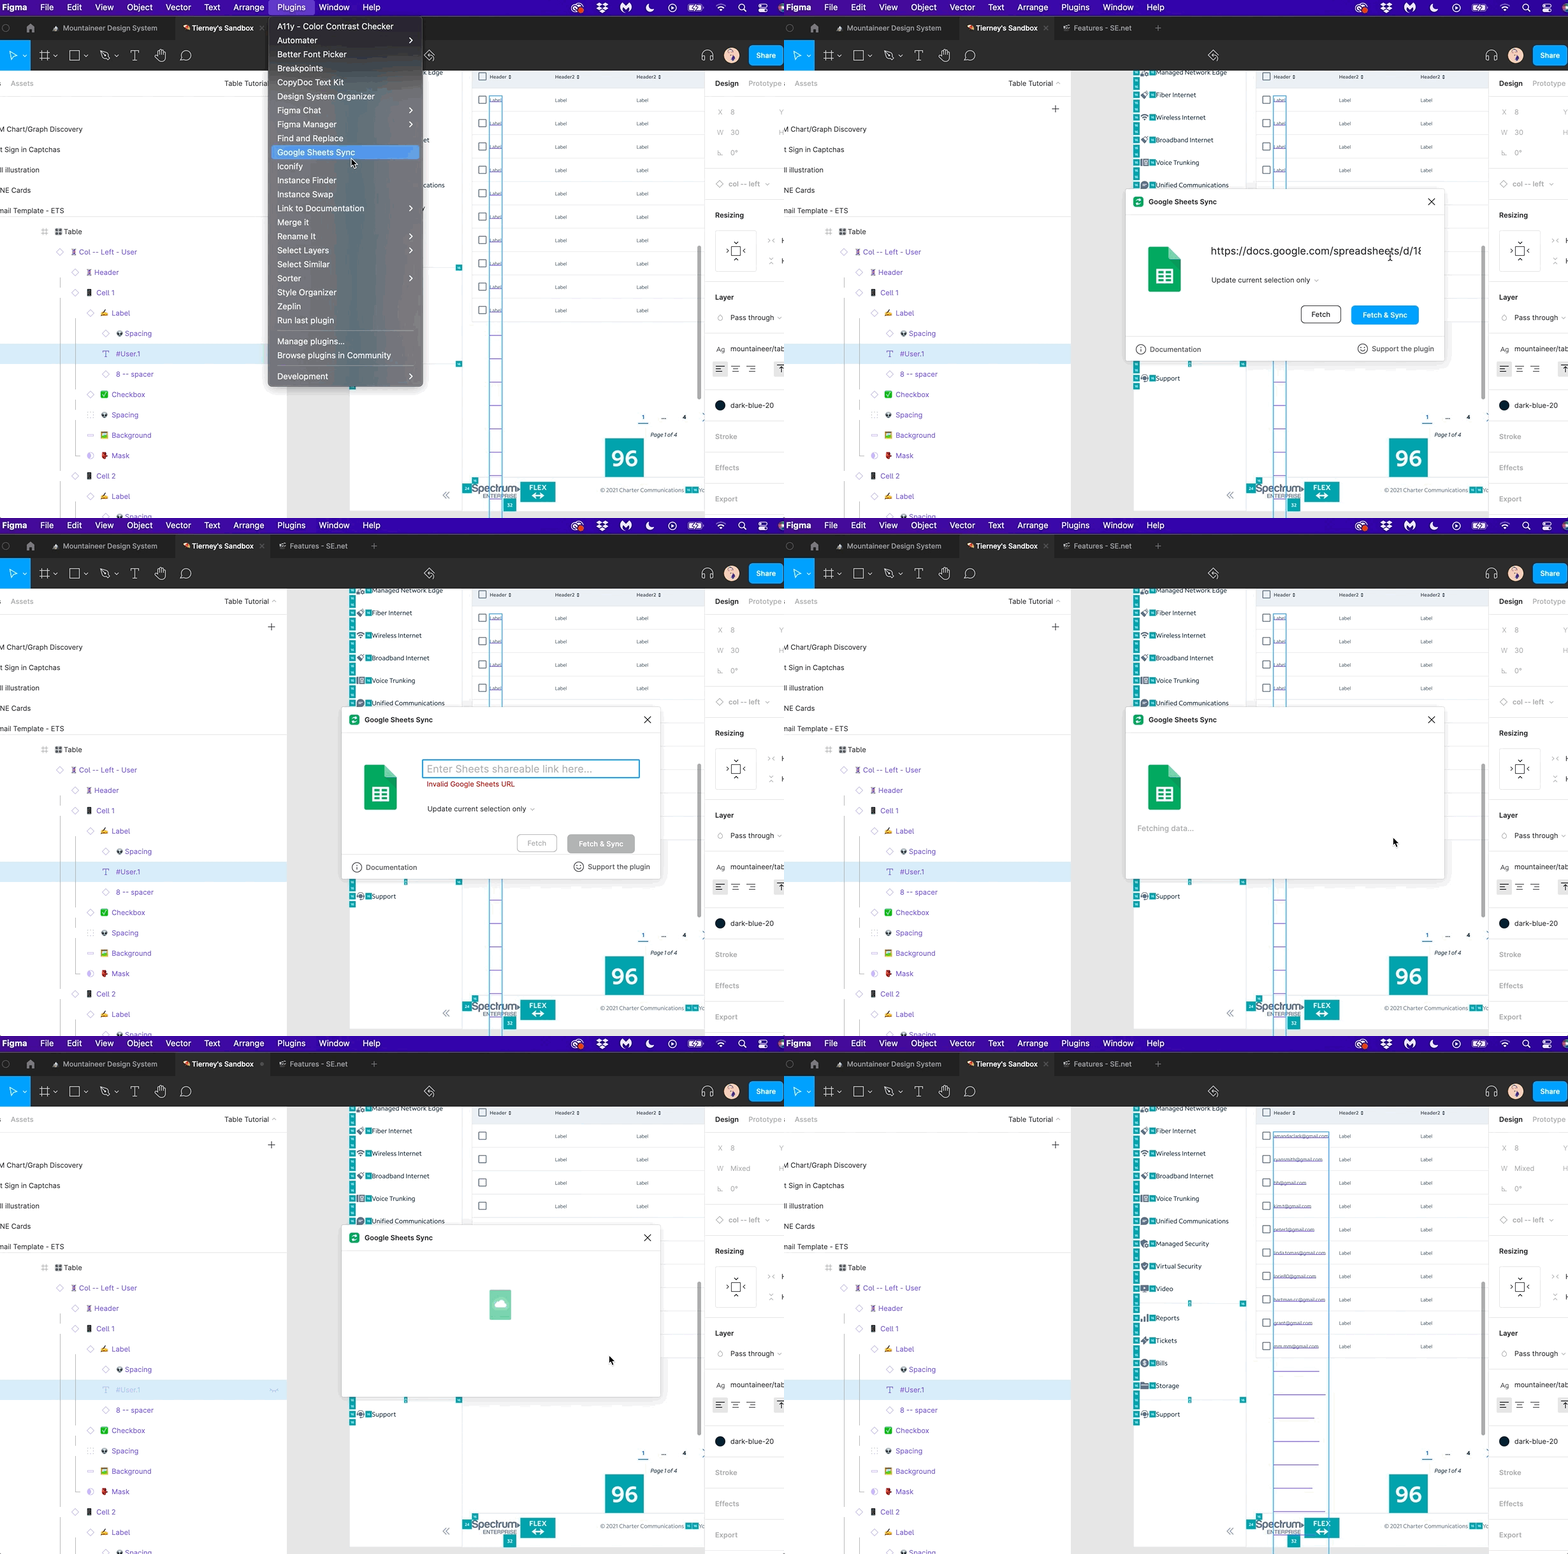
From there all you have to do is paste your link into the plugin and hit the fetch and sync button.
This will auto populate all of your rows for that column.
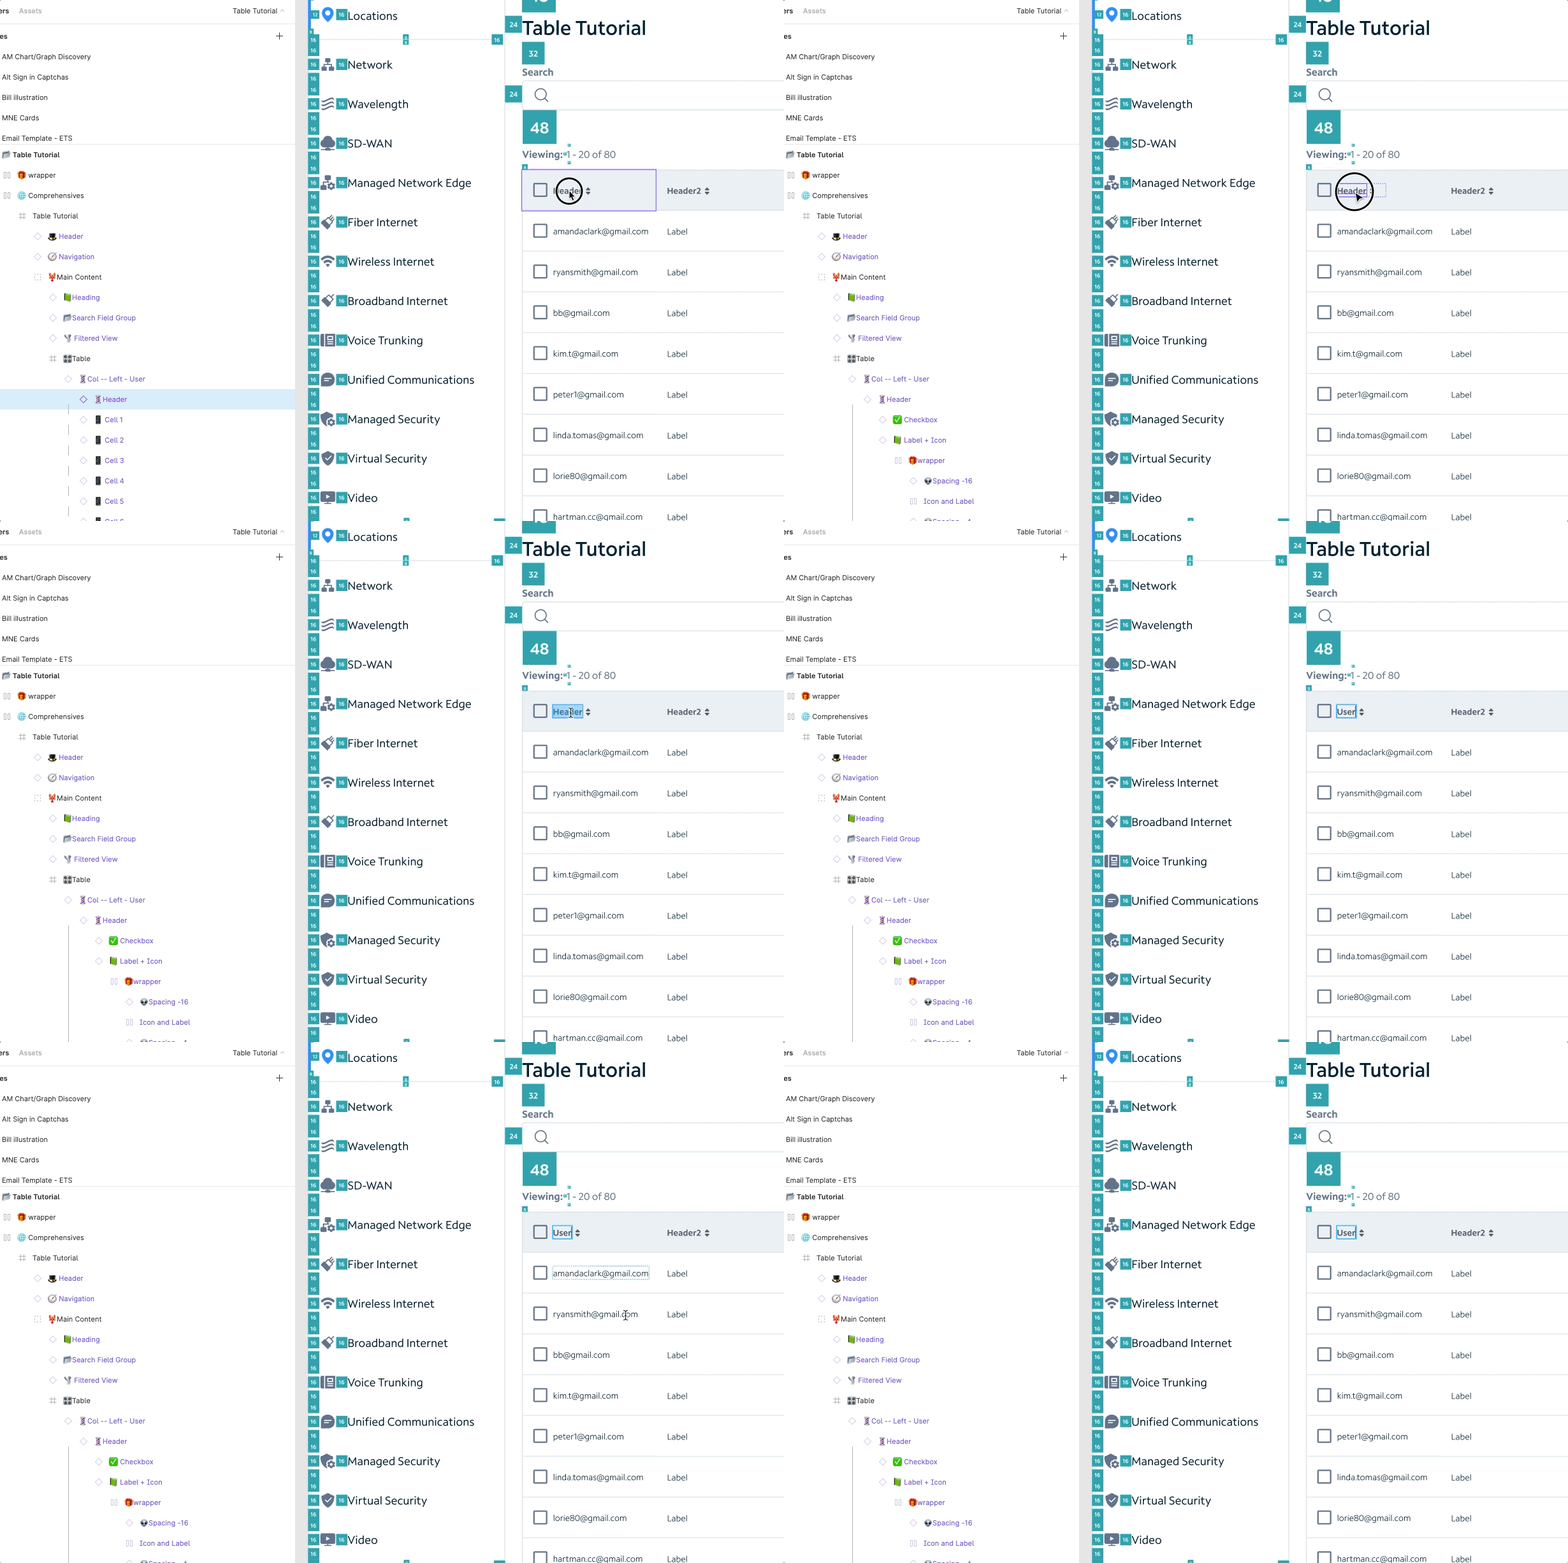
The only thing you will have to manually rename is the header. Do by clicking into the text box and manually typing the correct version.
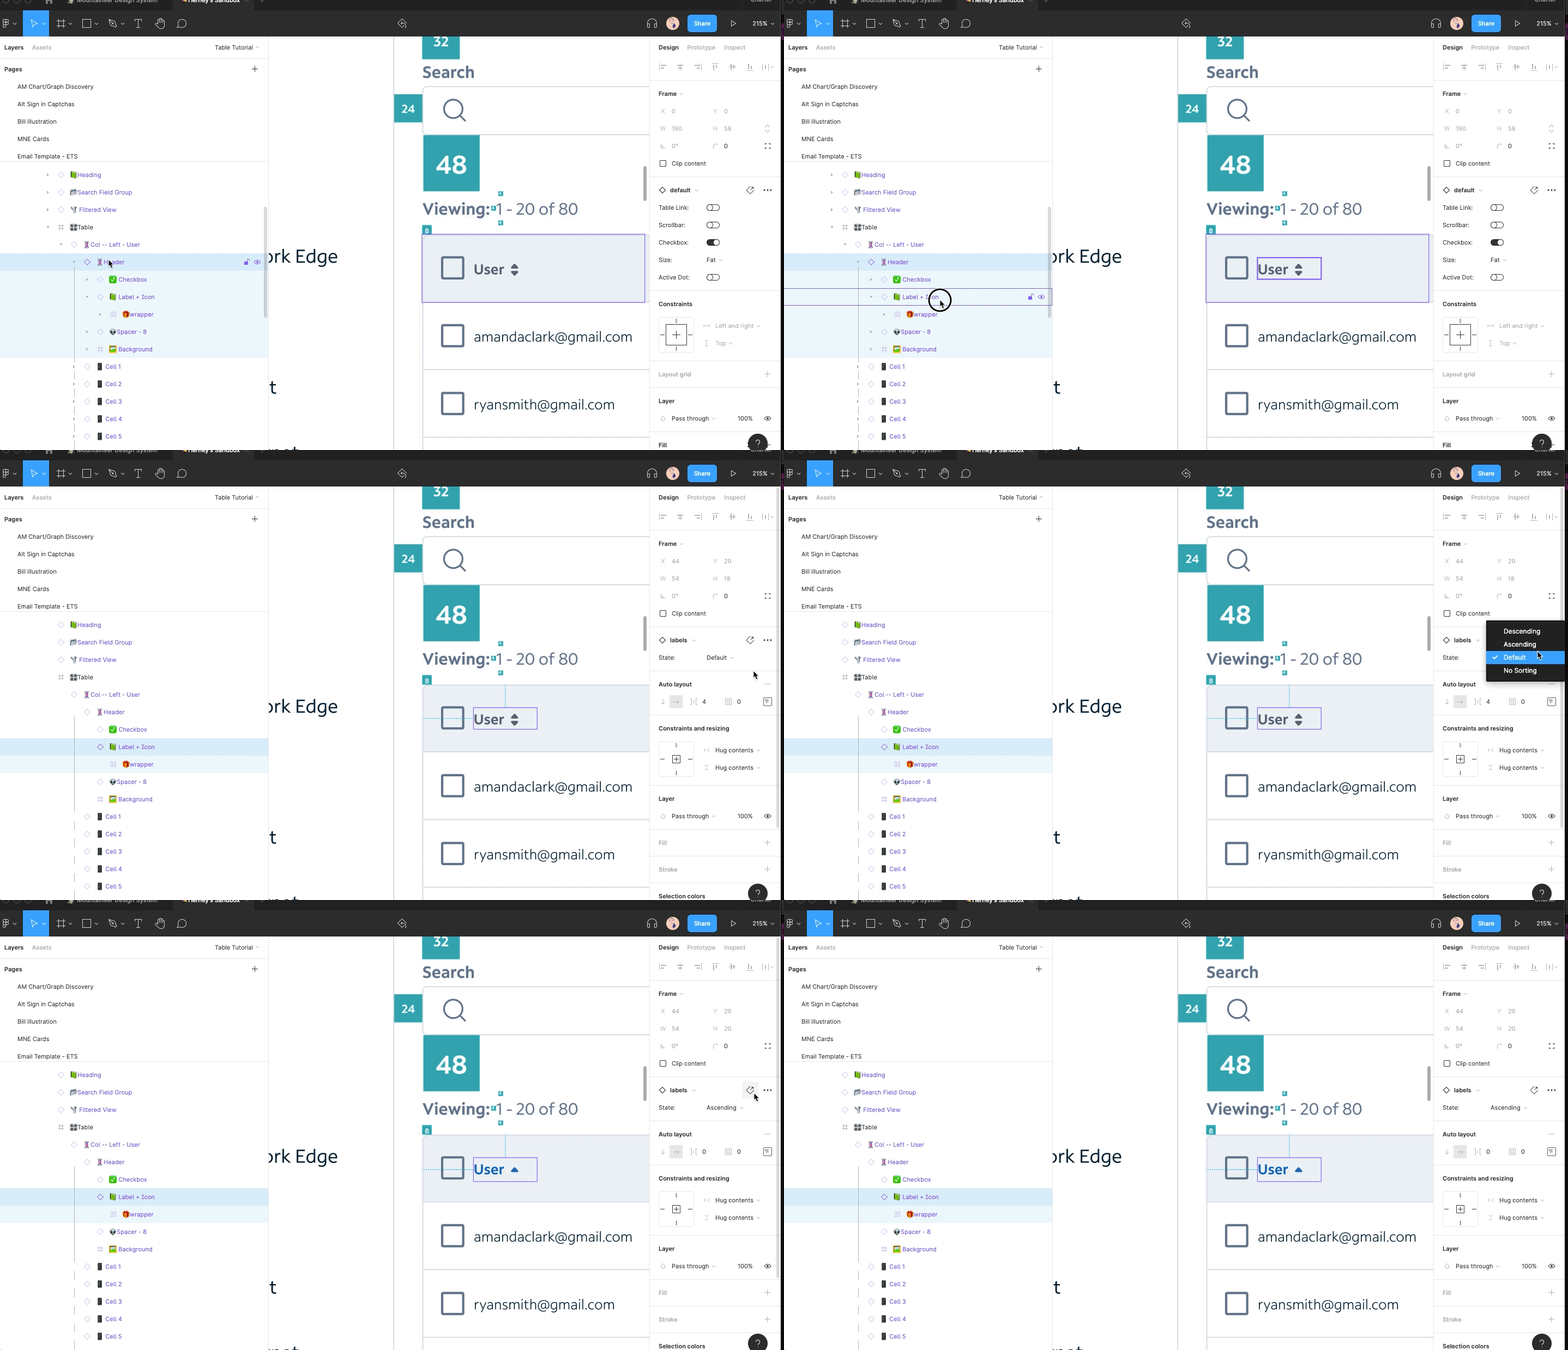
You can also change the type of header, if you need to show ascending, descending, or no sort, by clicking on the “📗Label + Icon” layer and changing the variant from the right side dropdown.
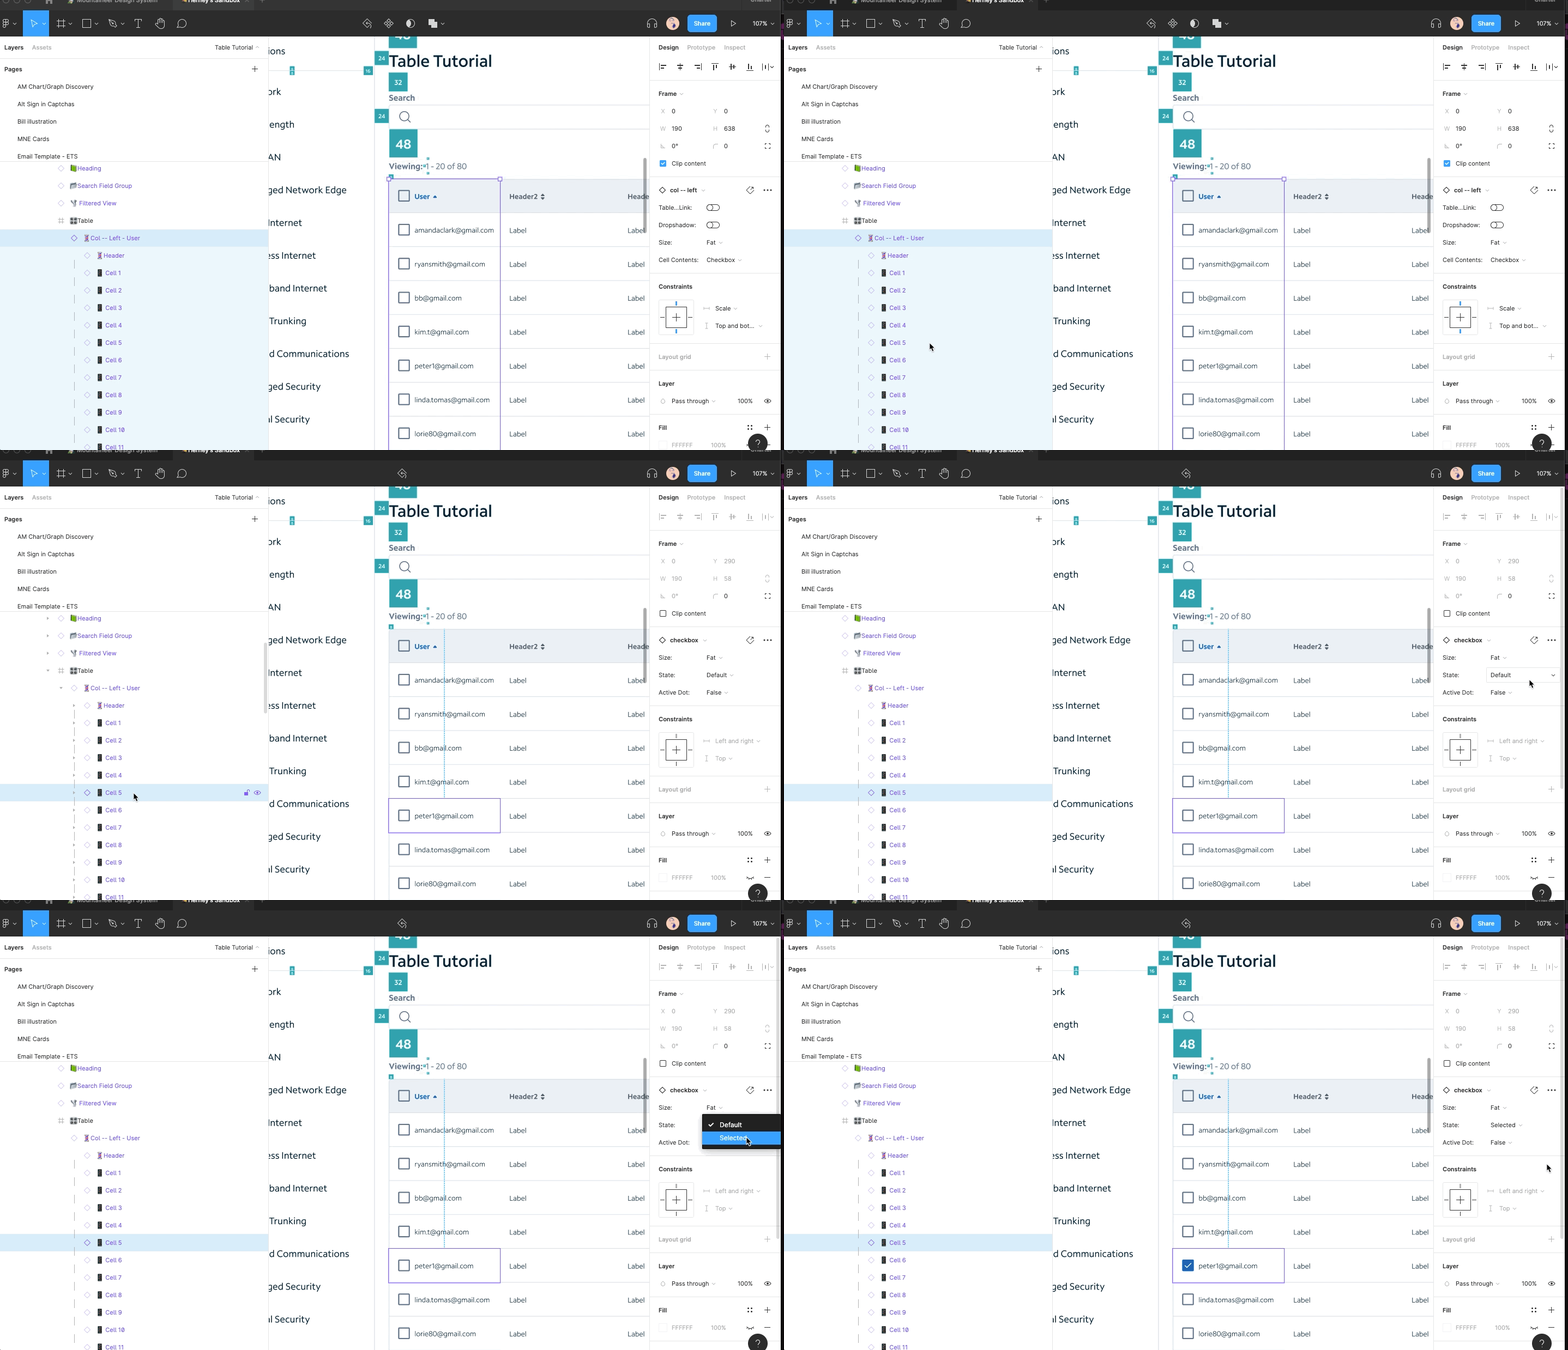
Since we are using a checkbox row in this example you can also change the variants from the Cell level to show as selected.
Select the cell(s) you would like to change and under the state variant menu switch from default to selected.
*Please note this is already an interactive component, so no need if you are prototyping.
Rinse and repeat these steps for the other columns, but hold off on doing the last column.
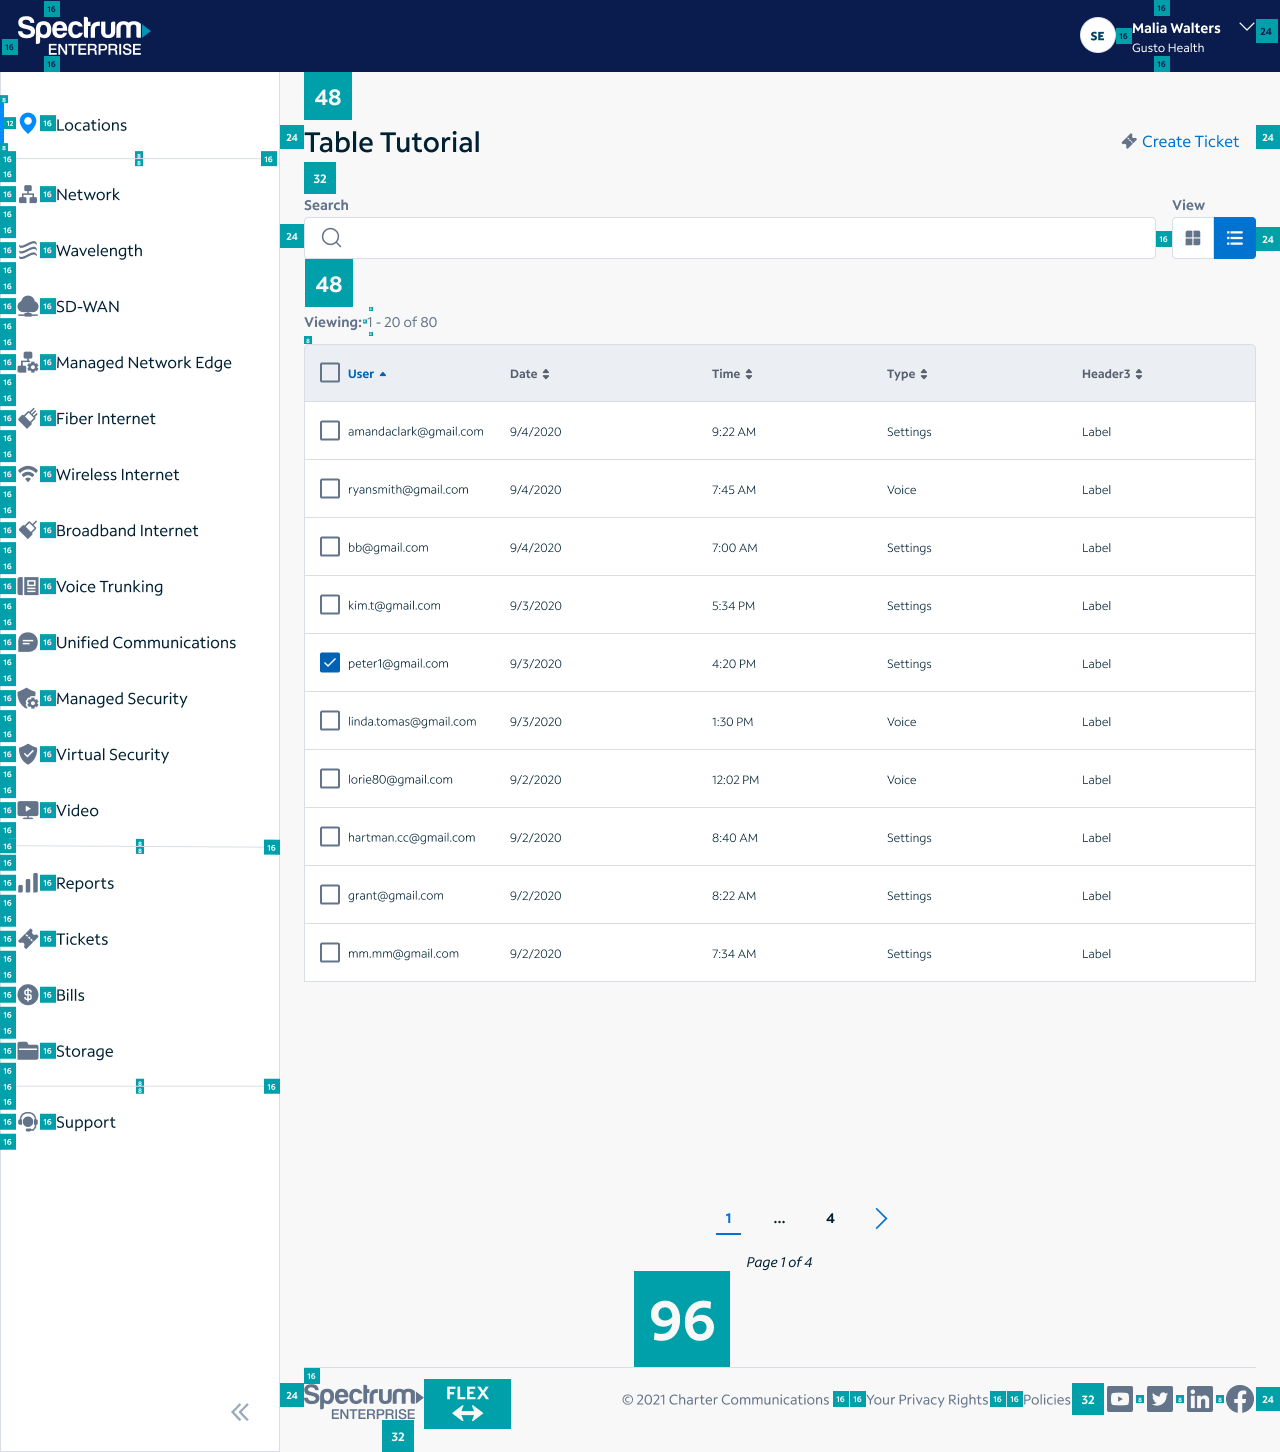
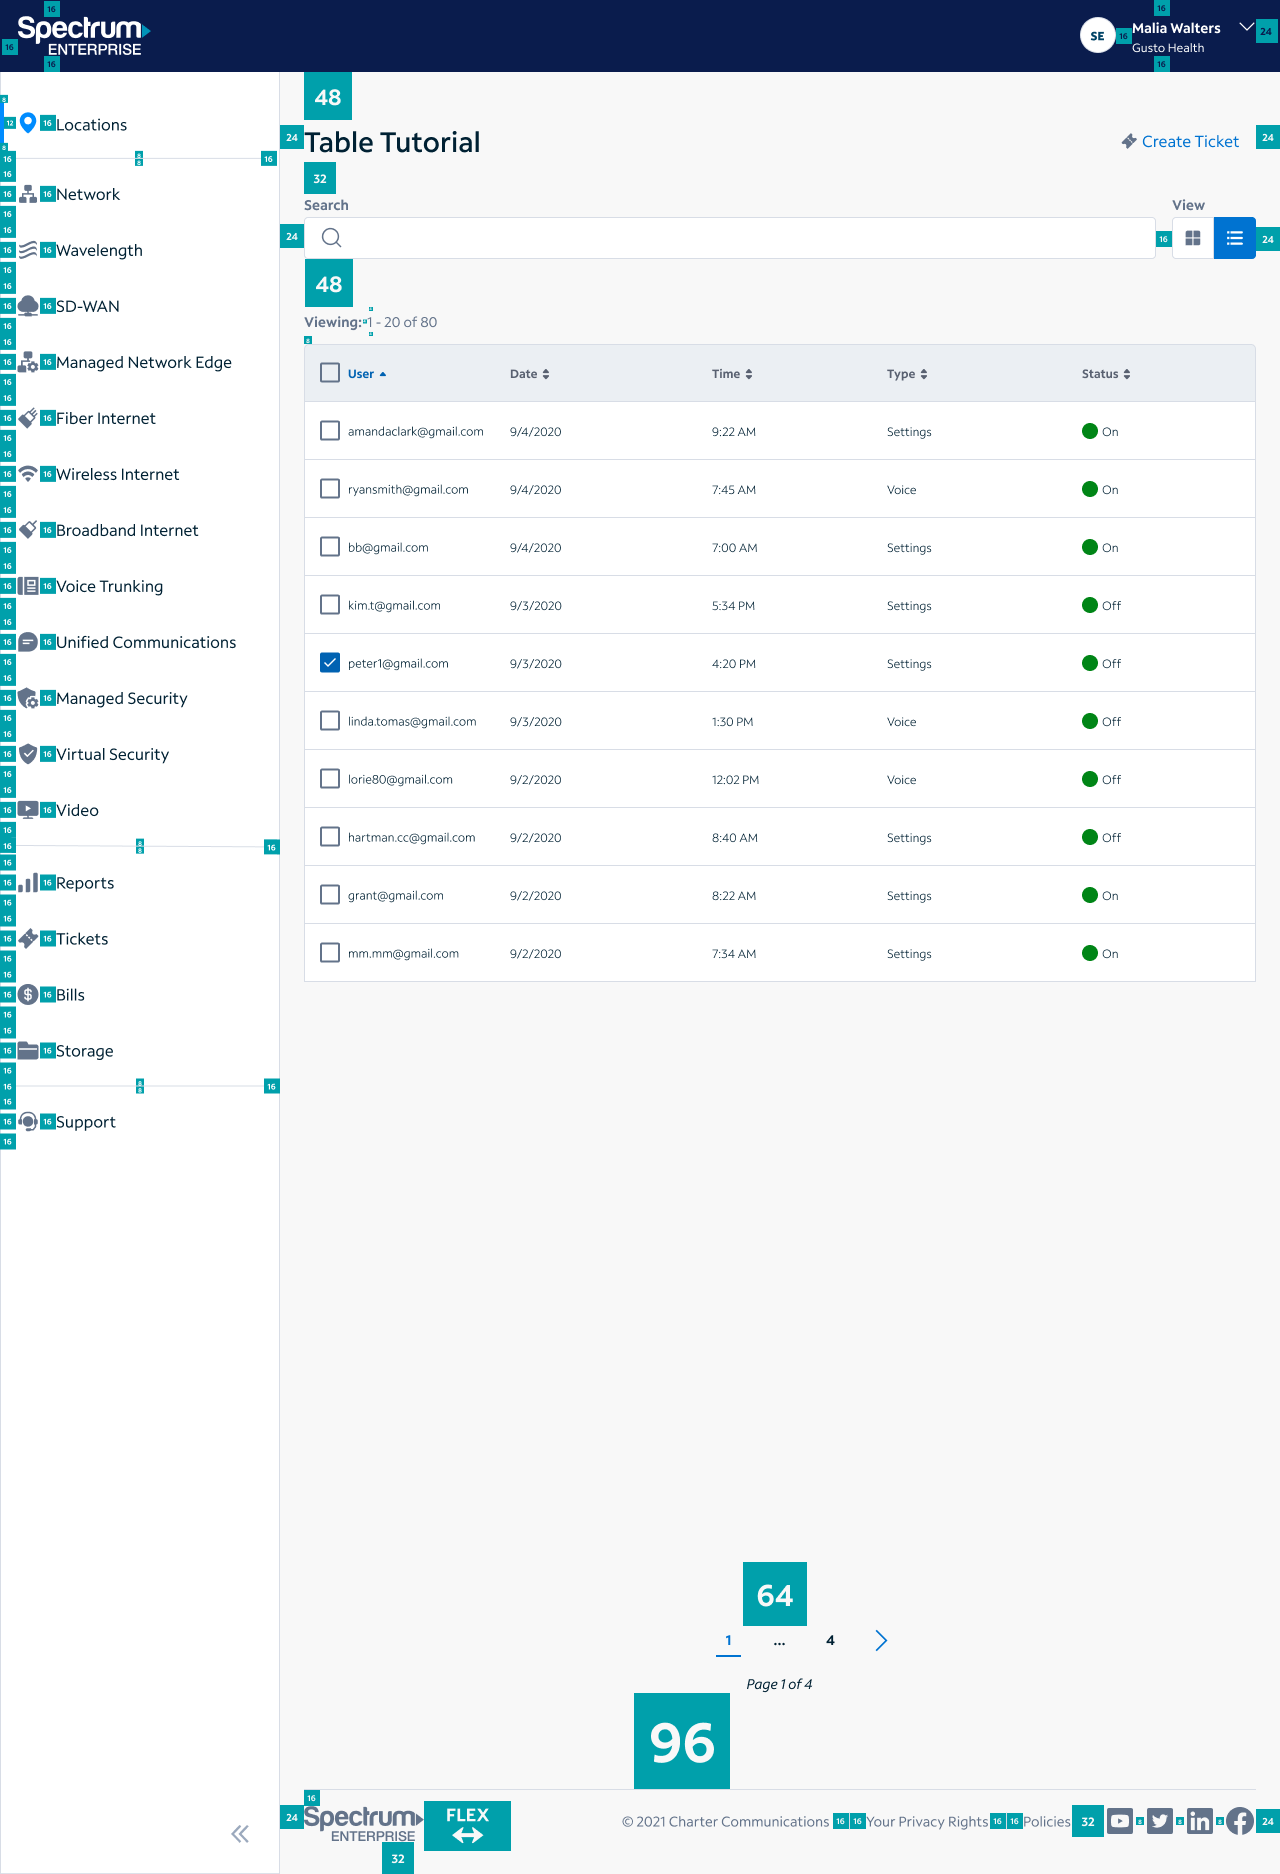
We are going to do something special with that. Your comp should look like the comp on the side when you are done.
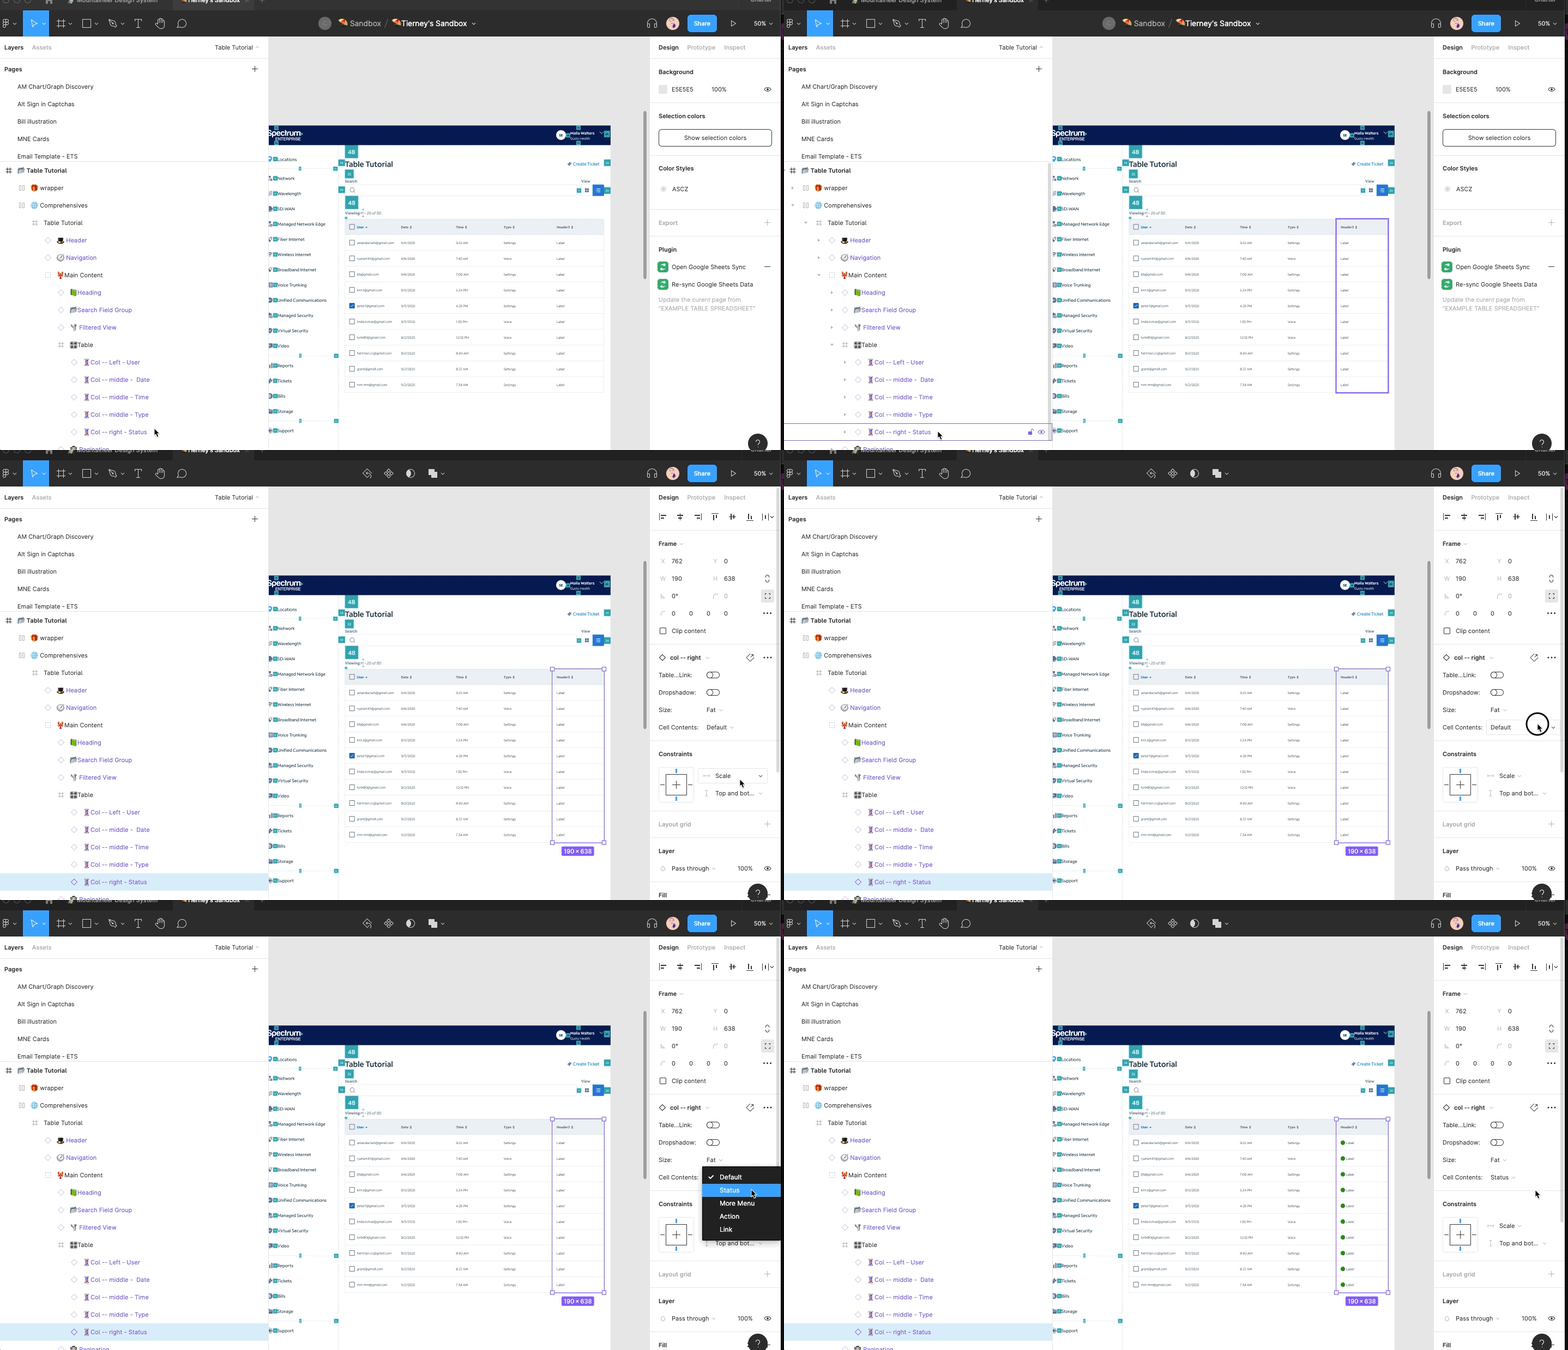
For the right column, since we are displaying the status, let’s go ahead and change it to a status column, where we can show different colored chips for a user to more easily scan.
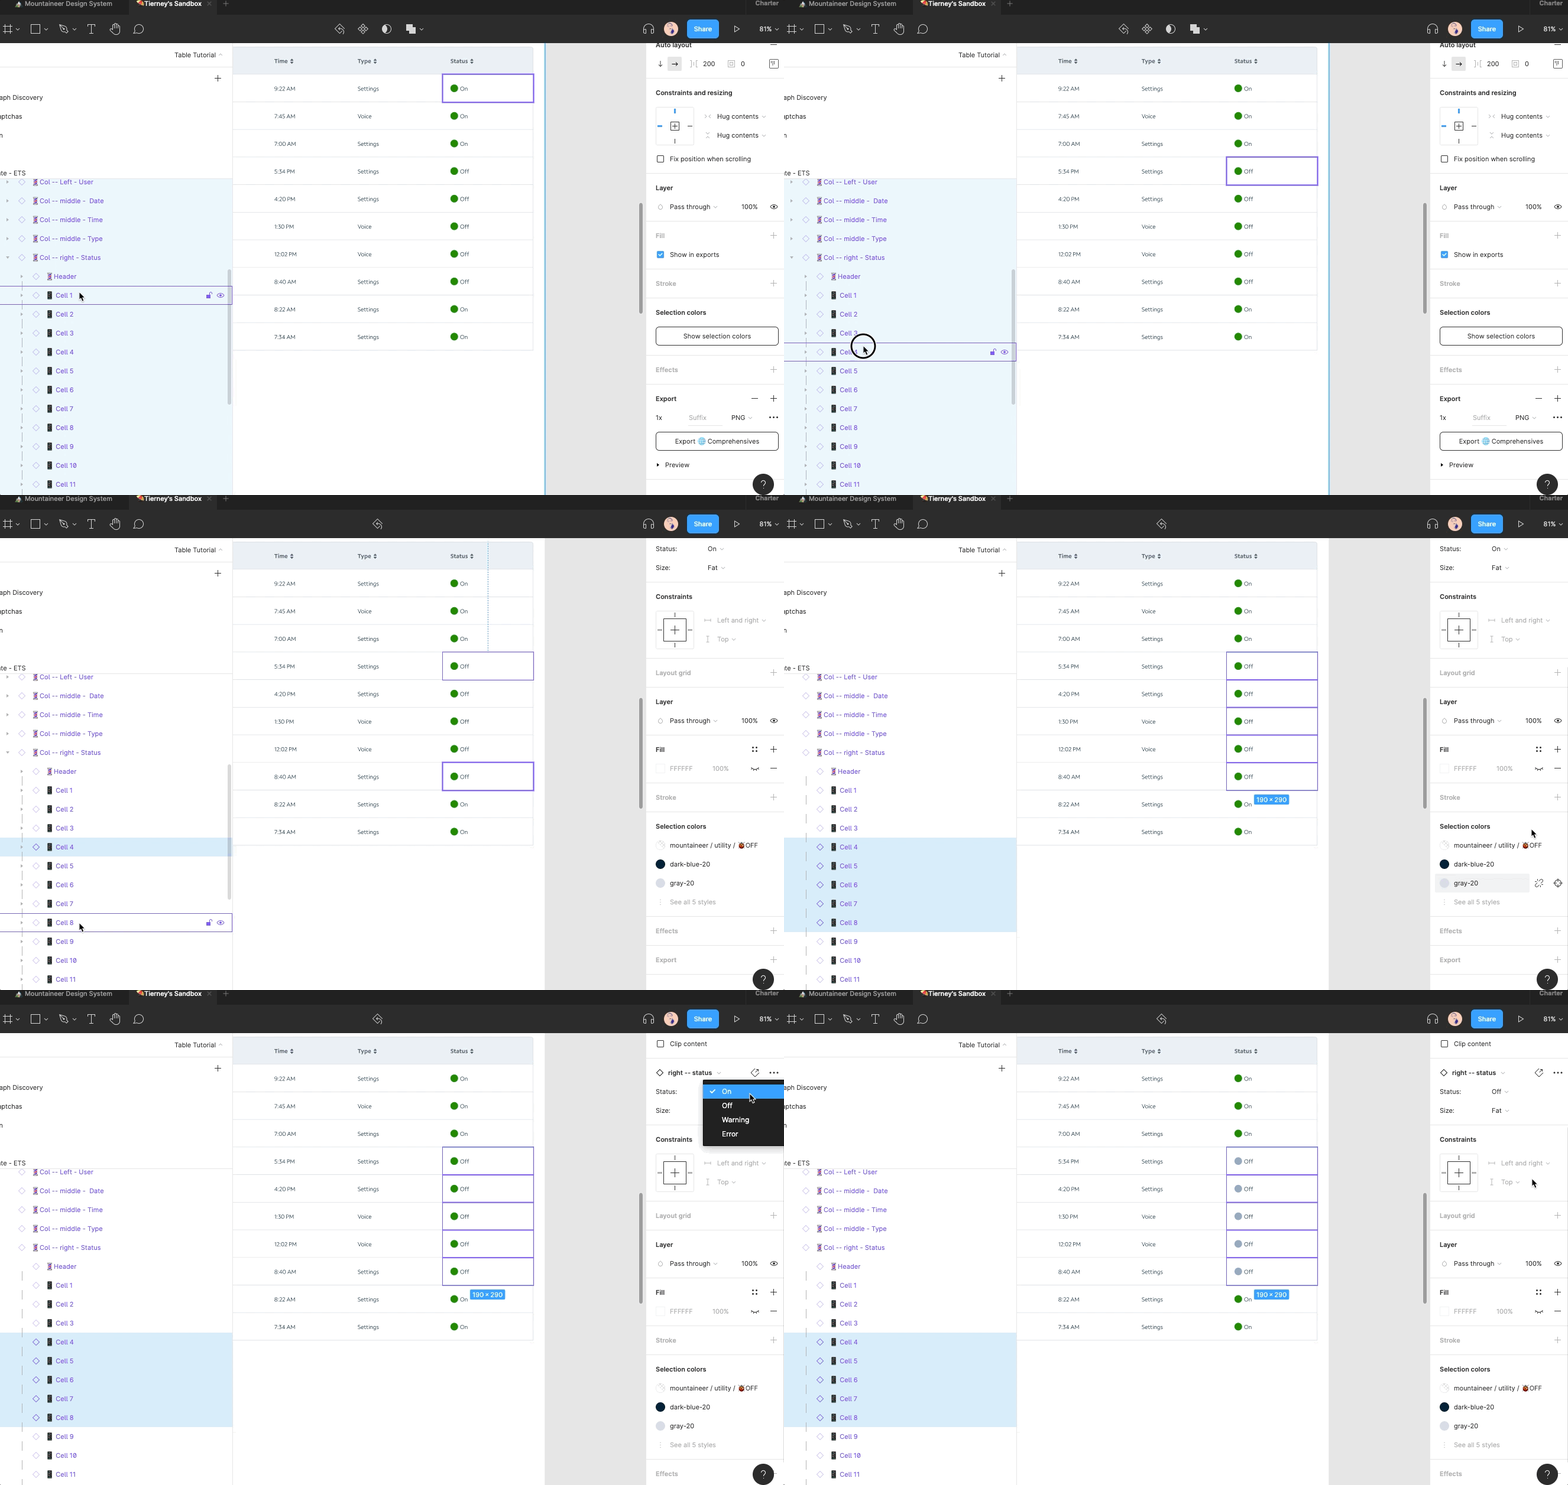
First off select the full column and change it in the right hand variant panel under cell contents to be Status. This will default everything to green (representing, on, active or success)
From there you can do the select layers, rename, and sheets sync, and renaming the header as you normally would. Giving you something that looks like the comp to the side.
You can then select the cells in the layers panel that you would like to change to “Off” and bulk change the variant accordingly.
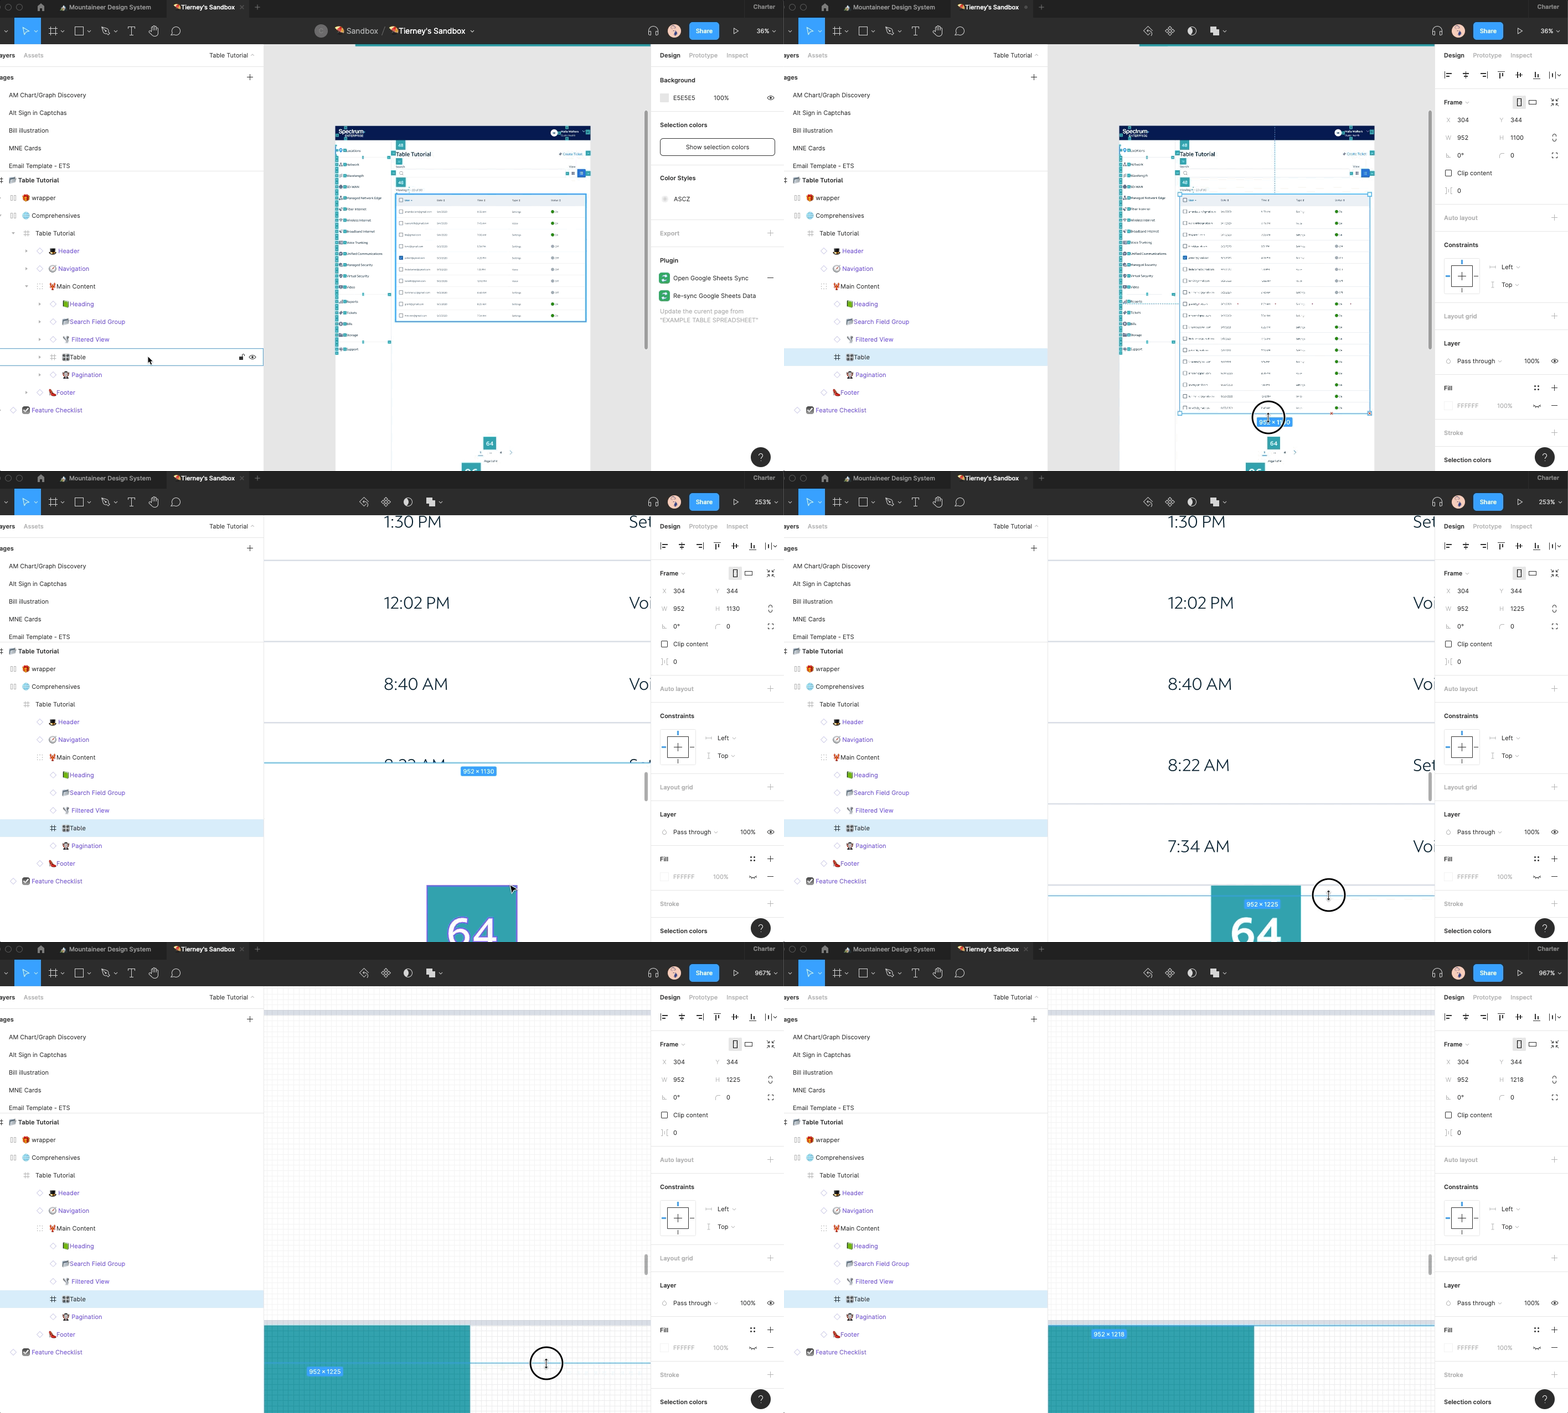
Now you can resize based on your table’s needs. As a quick note our table only accommodates 20 rows, so any more than that we won’t be able to show in our comps. To resize, click on the “ Table” frame. You can then drag down to accommodate the exact amount of rows you need. It should snap to the ends of each row as you are dragging, but it might be helpful to zoom in to make sure you are pixel perfect.
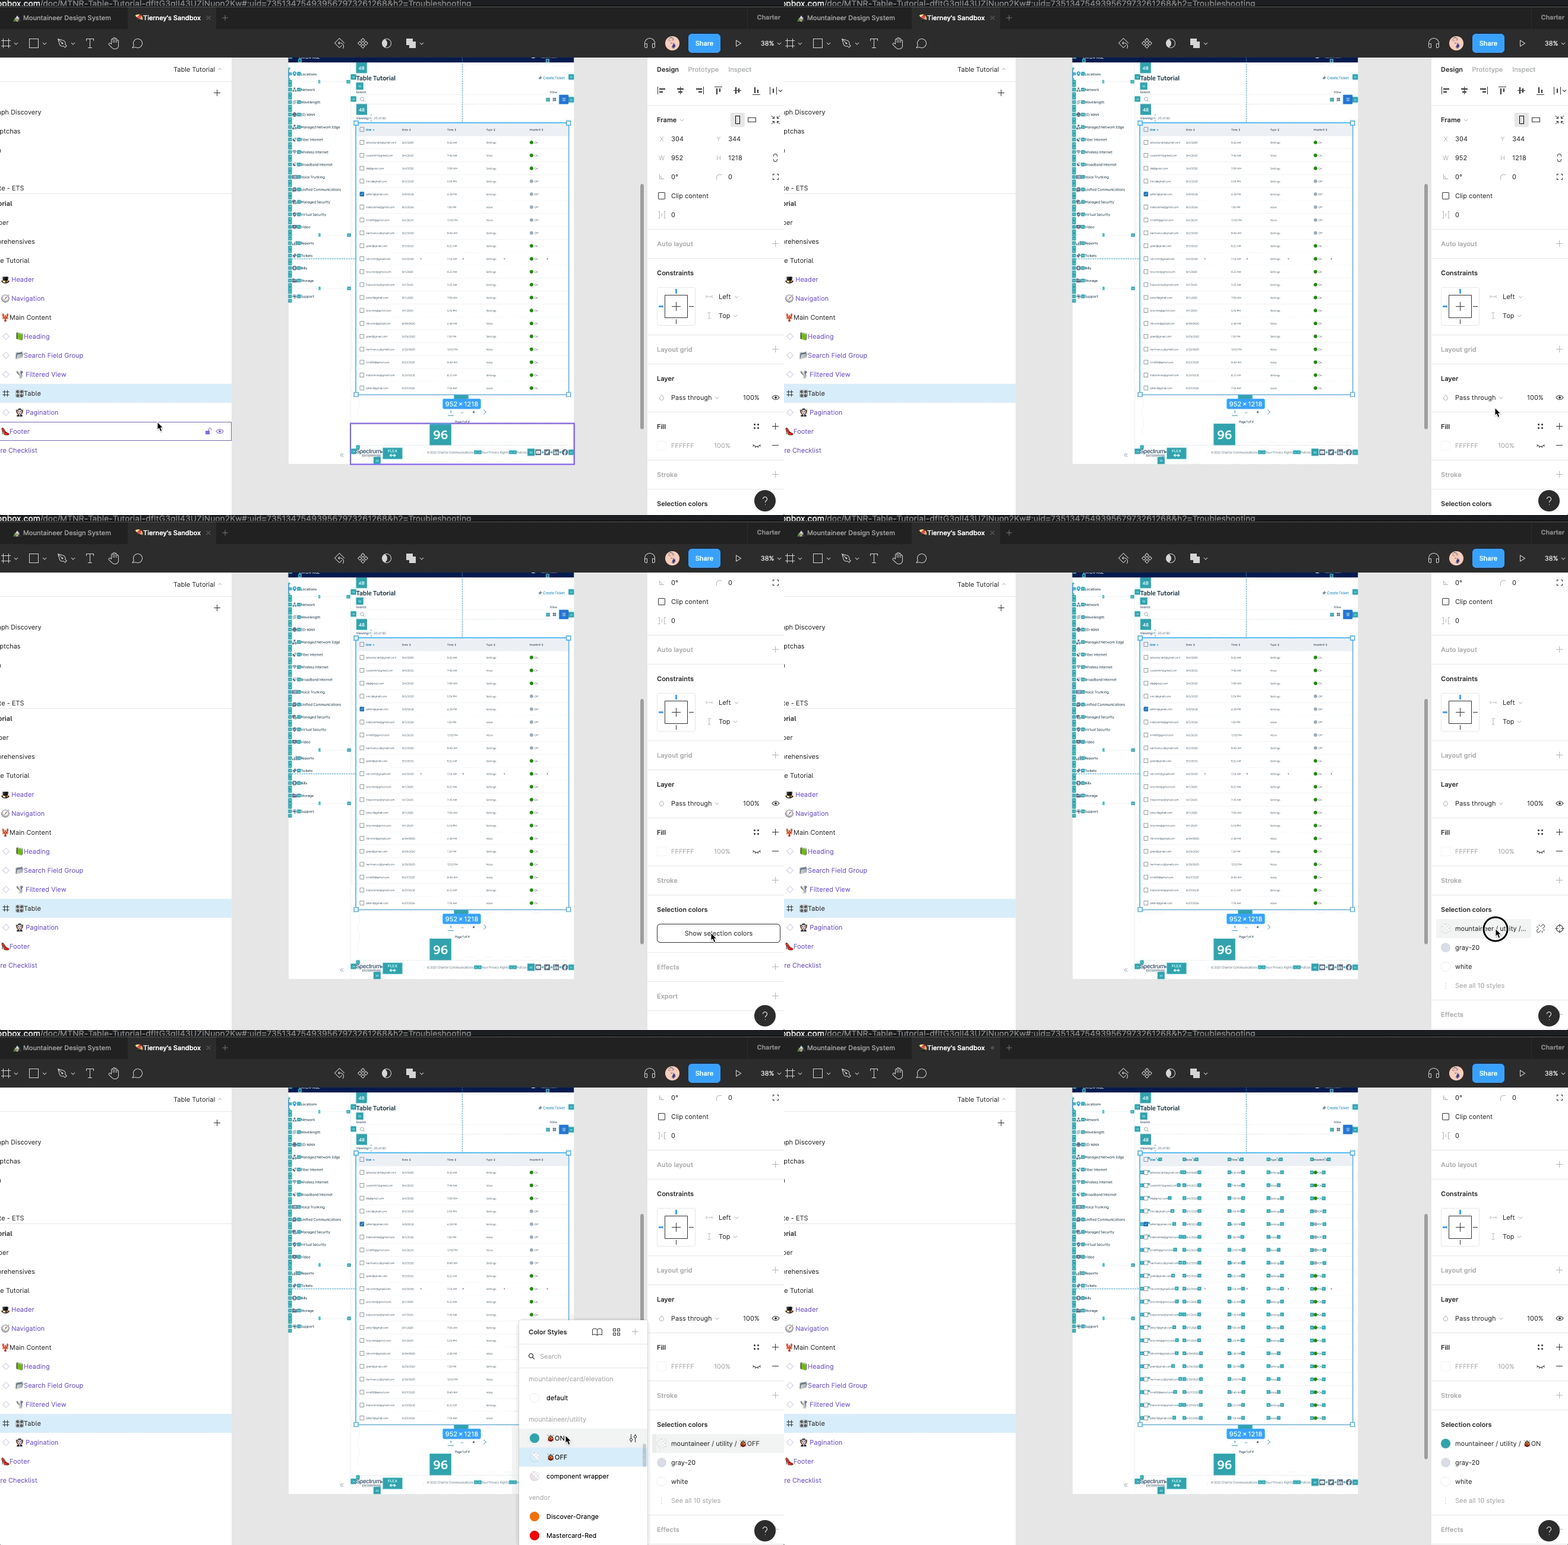
You can also select the table frame and toggle on spacer visibility.
Troubleshooting
These are the common problems that come up with using this table builder.
You cannot use this if it is part of a larger component (example if you are making each page a comp), either detach or drag the table outside of the parent component in order to use Google Sheets Sync.
Make sure when you are renaming (Command + R), your spelling and capitalization need match the google sheet you are using.
Make sure that you are not trying to create a comp that has more than 20 rows.
Try not to manually get too into the layers there is a lot of nesting, and for the most part you shouldn’t have to change much manually.
When using the select layers tool make sure you’ve typed “Label” and have the exact match checkbox checked.
Since most of this data is dummy data, try to re-use tables that have already been made if possible. This will save you a lot of time.
Make sure the google sheet only has one page, sometimes the plugin will get confused because it won’t be sure what to target.

